さあ今回は”インタラクティブなWidget”の使い方について学んでいこう!!
前回までは”インタラクティブなWidget”についてまとめてきました👇
画面遷移はアプリ開発でも必ず出てくる必須の実装スキルになります、ここで基本的な部分は学びきってしまおう!
ではさっそくやっていきます✊
Contents
画面遷移(Screen transition)
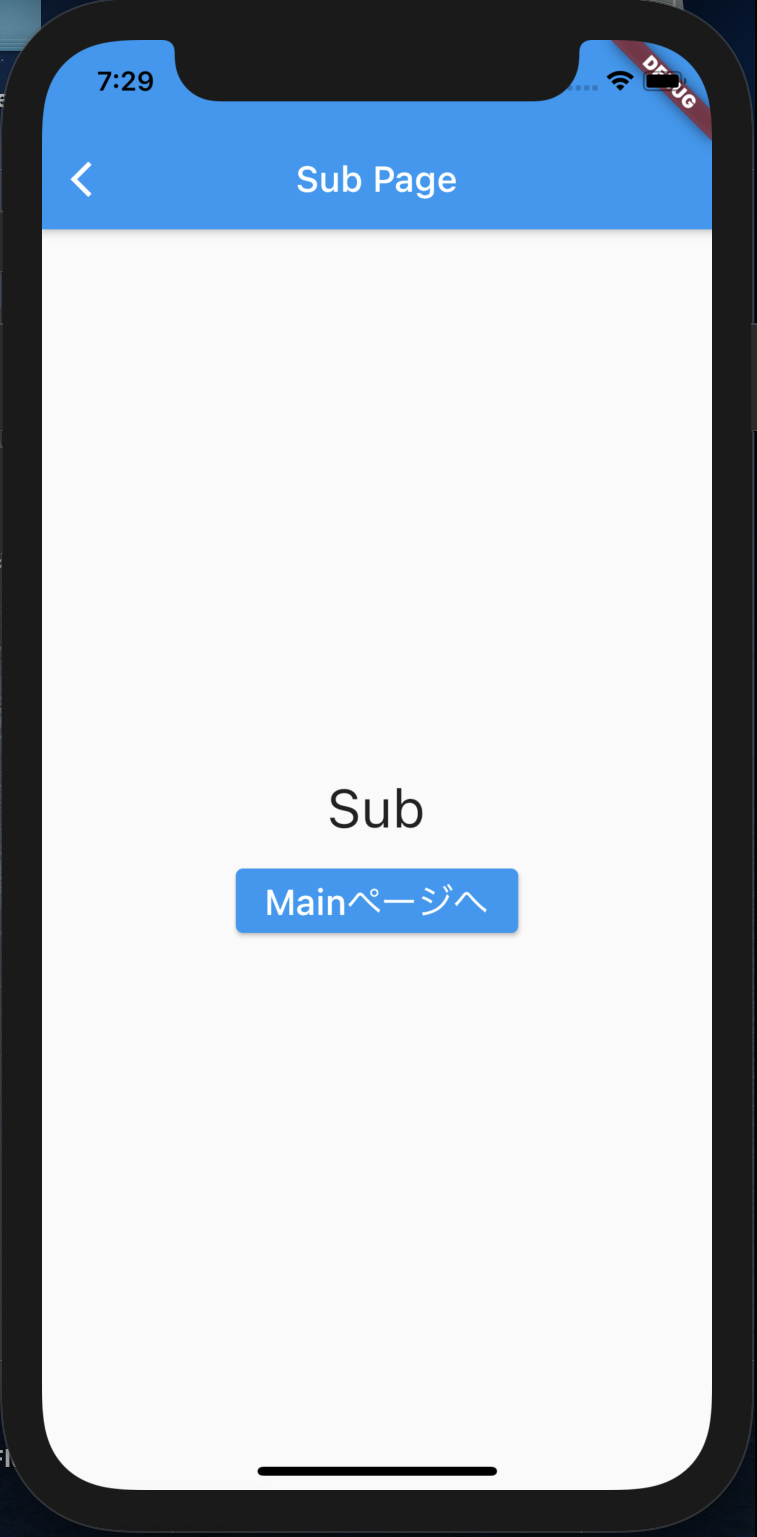
👇画面遷移の実装例です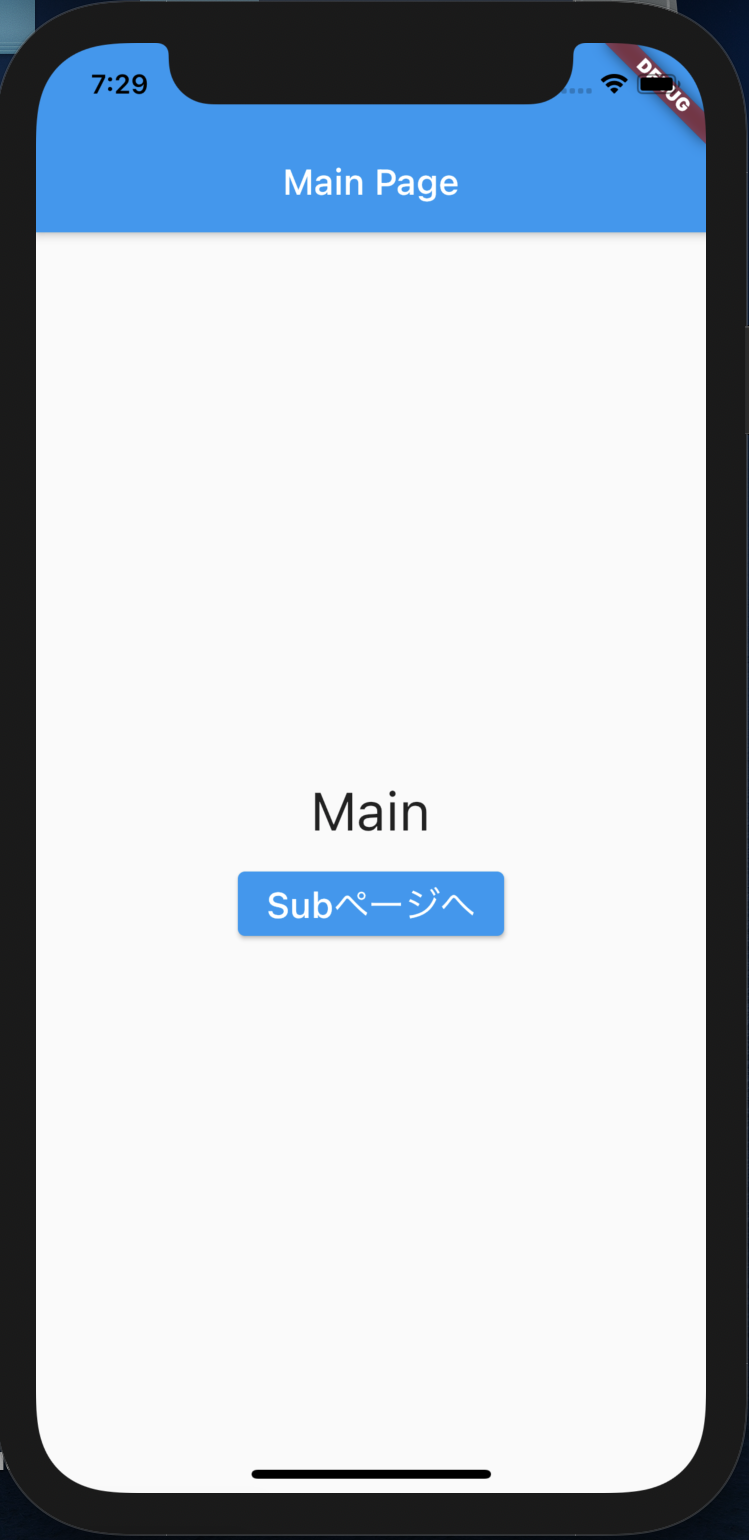
|
1 2 3 4 5 6 7 8 9 10 11 12 13 14 15 16 17 18 19 20 21 22 23 24 25 26 27 28 29 30 31 32 33 34 35 36 37 38 39 40 41 42 43 44 45 46 47 48 49 50 51 52 53 54 55 56 57 58 59 60 61 62 63 64 65 66 67 68 69 70 71 72 73 74 75 76 77 78 79 80 81 82 83 84 85 86 87 |
/* Screen transition */ import 'package:flutter/material.dart'; void main() => runApp(MyApp()); class MyApp extends StatelessWidget { @override Widget build(BuildContext context) { return MaterialApp( title: 'screen transition', home: MainPage(), // routesで遷移元と遷移先のurlを設定する routes: <String, WidgetBuilder>{ '/home': (BuildContext context) => MainPage(), '/subpage': (BuildContext context) => SubPage(), }, ); } } class MainPage extends StatelessWidget { @override Widget build(BuildContext context) { return Scaffold( appBar: AppBar(title: Text('Main Page')), body: Container( child: Center( child: Column( mainAxisAlignment: MainAxisAlignment.center, children: <Widget>[ Text( 'Main', style: TextStyle(fontSize: 30), ), Padding(padding: EdgeInsets.only(bottom: 10)), ElevatedButton( //.MainPageの画面にSubPageの画面を上乗せする onPressed: () => Navigator.of(context).pushNamed("/subpage"), child: Text( 'Subページへ', style: TextStyle(fontSize: 20), ), ), ], ), ), ), ); } } class SubPage extends StatelessWidget { @override Widget build(BuildContext context) { return Scaffold( appBar: AppBar( title: Text( 'Sub Page', style: TextStyle(fontSize: 20), )), body: Container( child: Center( child: Column( mainAxisAlignment: MainAxisAlignment.center, children: <Widget>[ Text( 'Sub', style: TextStyle(fontSize: 30), ), Padding(padding: EdgeInsets.only(bottom: 10)), ElevatedButton( //現在の画面(SubPage)を取り除く onPressed: () => Navigator.of(context).pop(), child: Text( 'Mainページへ', style: TextStyle(fontSize: 20), ), ), ], ), ), ), ); } } |
TabBar
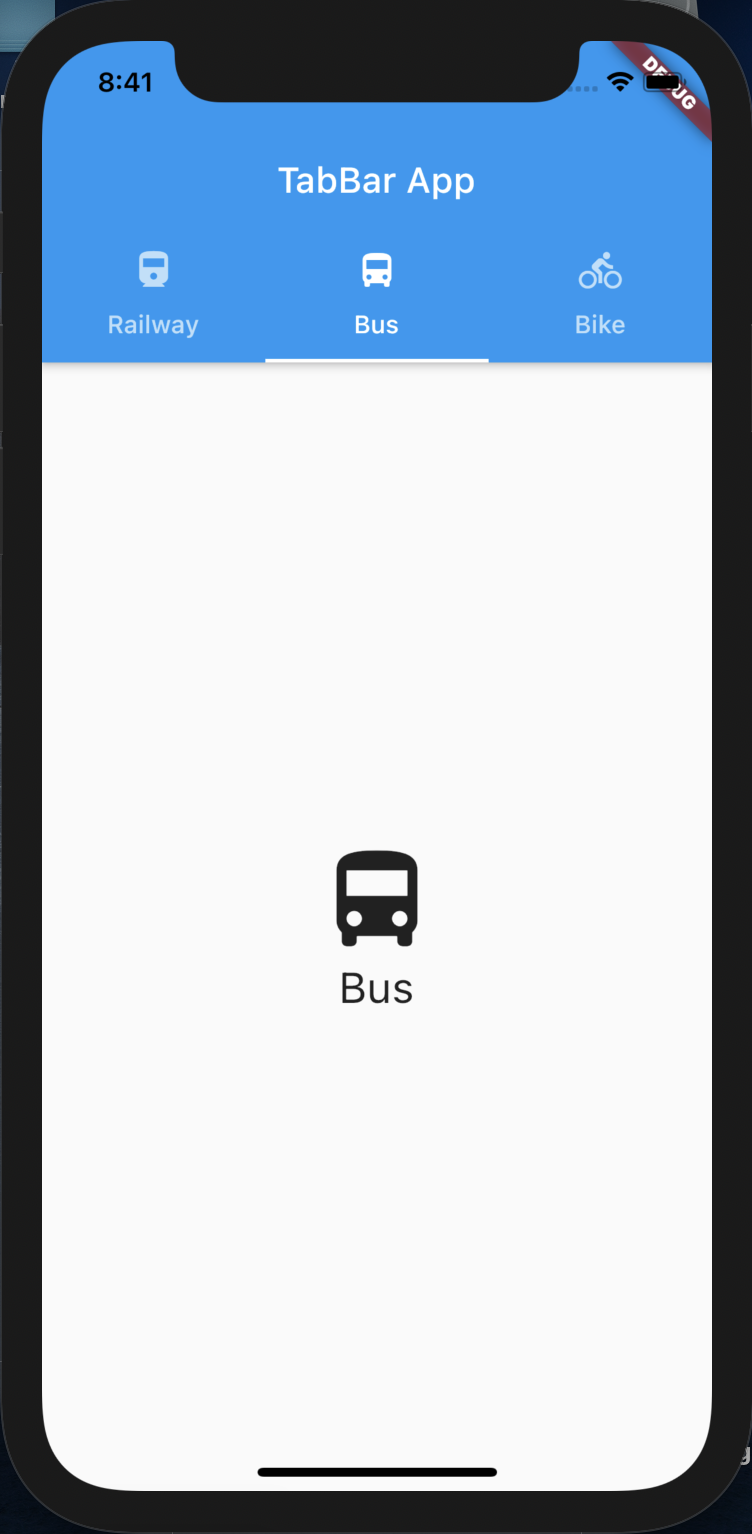
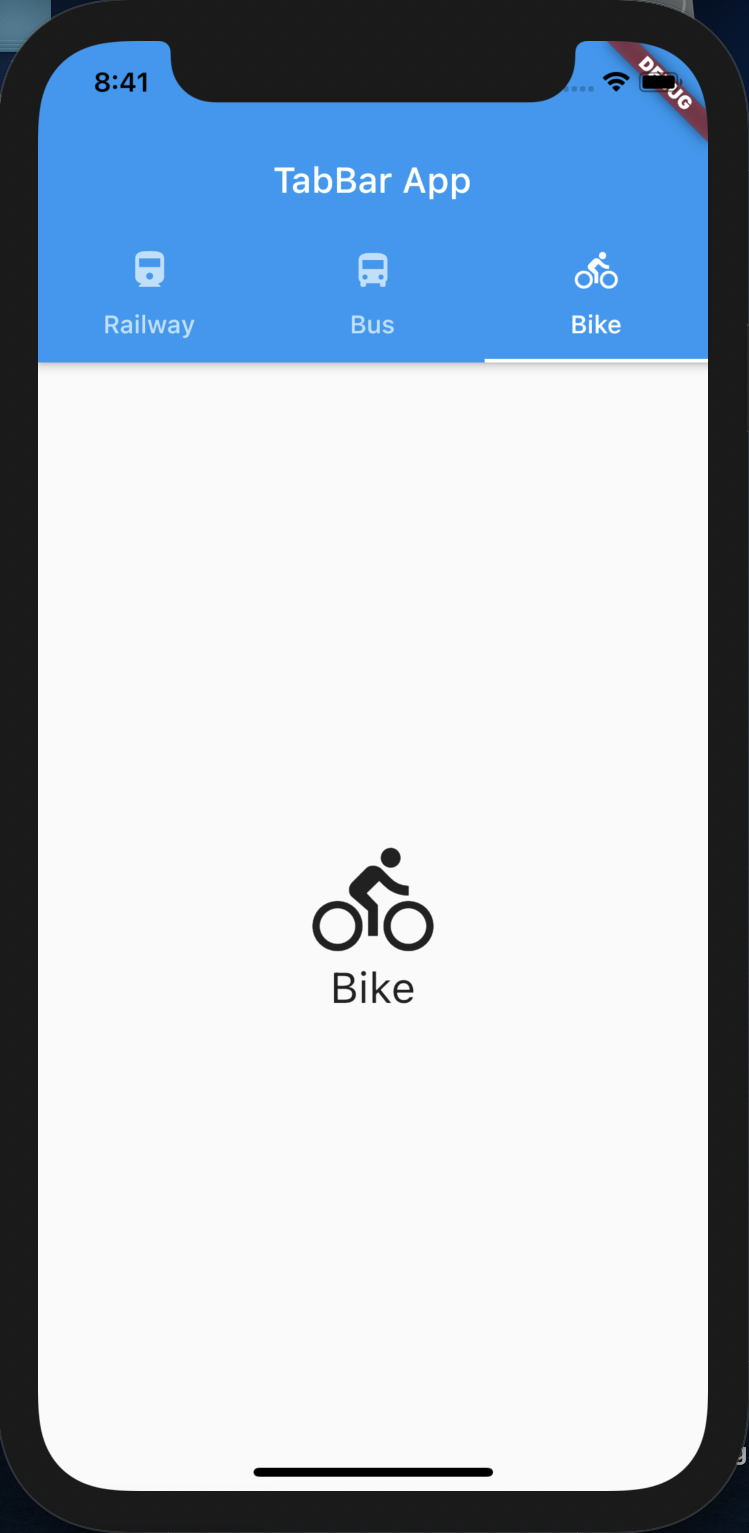
👇 TabBarを使った実装例です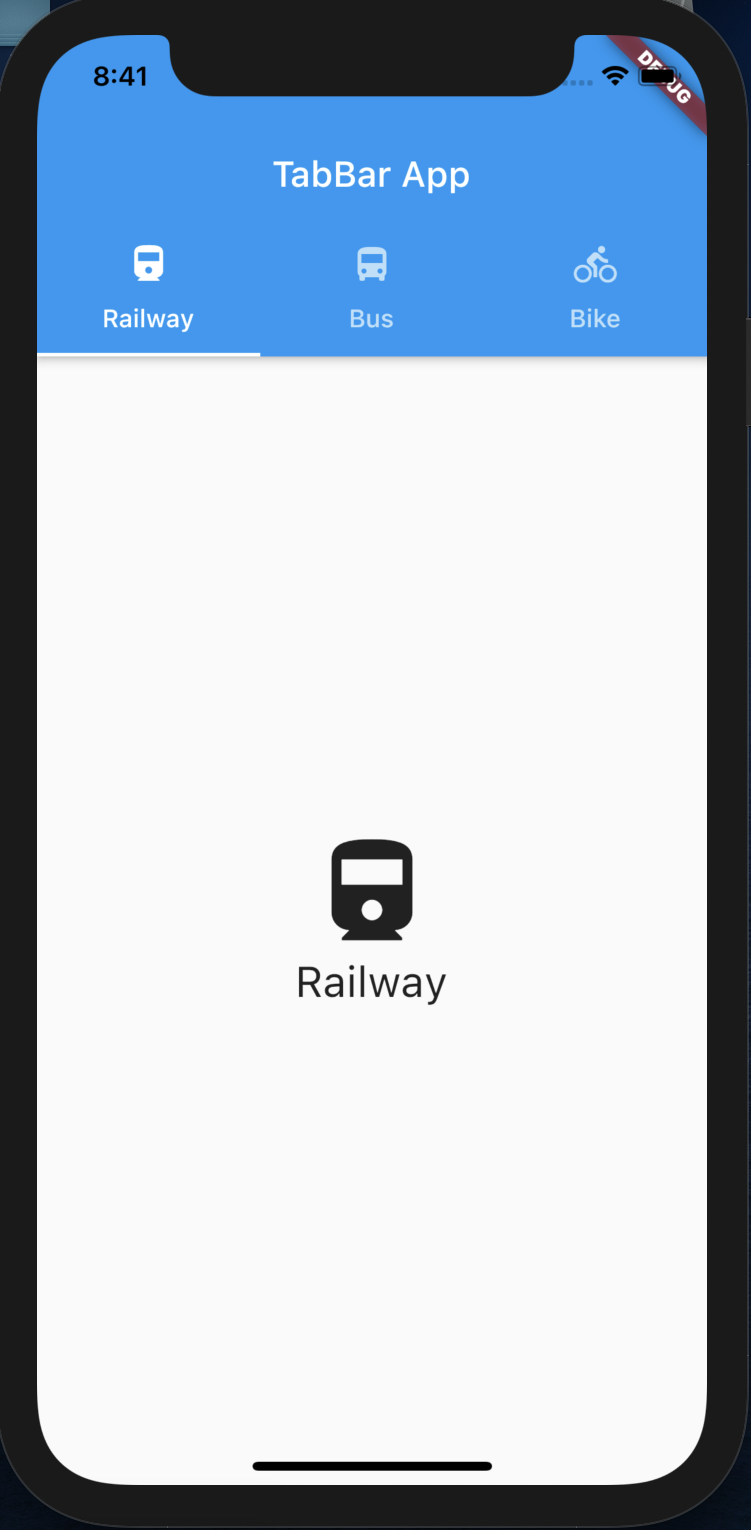
|
1 2 3 4 5 6 7 8 9 10 11 12 13 14 15 16 17 18 19 20 21 22 23 24 25 26 27 28 29 30 31 32 33 34 35 36 37 38 39 40 41 42 43 44 45 46 47 48 49 50 51 52 53 54 55 56 57 58 59 60 61 62 63 64 65 66 67 68 69 70 71 72 73 74 75 76 77 |
/* TabBar */ import 'package:flutter/material.dart'; void main() => runApp(MyApp()); class MyApp extends StatelessWidget { @override Widget build(BuildContext context) { return MaterialApp( title: 'TabBar practice App', // TabBarPage関数をhomeに設定 home: TabBarPage(), ); } } class TabBarPage extends StatefulWidget { @override _TabBarPageState createState() => _TabBarPageState(); } class _TabBarPageState extends State<TabBarPage> { // タブバーで表示するアイコンのリストを_tabに格納 final _tab = <Tab>[ Tab(text: "Railway", icon: Icon(Icons.directions_railway)), Tab(text: "Bus", icon: Icon(Icons.directions_bus)), Tab(text: "Bike", icon: Icon(Icons.directions_bike)), ]; // TabBar,TabBarView, DefaultTabControllerを使い、タブバーとそれに連動するタブページを表示 Widget build(BuildContext context) { return DefaultTabController( length: _tab.length, child: Scaffold( appBar: AppBar( title: Text('TabBar App'), bottom: TabBar(tabs: _tab), ), body: TabBarView( children: <Widget>[ TabPage(title: "Railway", icon: Icons.directions_railway), TabPage(title: "Bus", icon: Icons.directions_bus), TabPage(title: "Bike", icon: Icons.directions_bike), ], ), ), ); } } // TabPageの詳細を設定するクラス class TabPage extends StatelessWidget { final IconData icon; final String title; // コンストラクタの作成(titleとiconを引数にして親クラスを継承) const TabPage({Key key, this.title, this.icon}) : super(key: key); @override Widget build(BuildContext context) { // Textに適応させるTextStyleをTheme(headline5)から持ってくる final TextStyle textStyle = Theme.of(context).textTheme.headline5; return Center( child: Column( mainAxisAlignment: MainAxisAlignment.center, children: [ Icon( icon, size: 68, ), Text(title, style: textStyle), ], ), ); } } |
Drawer
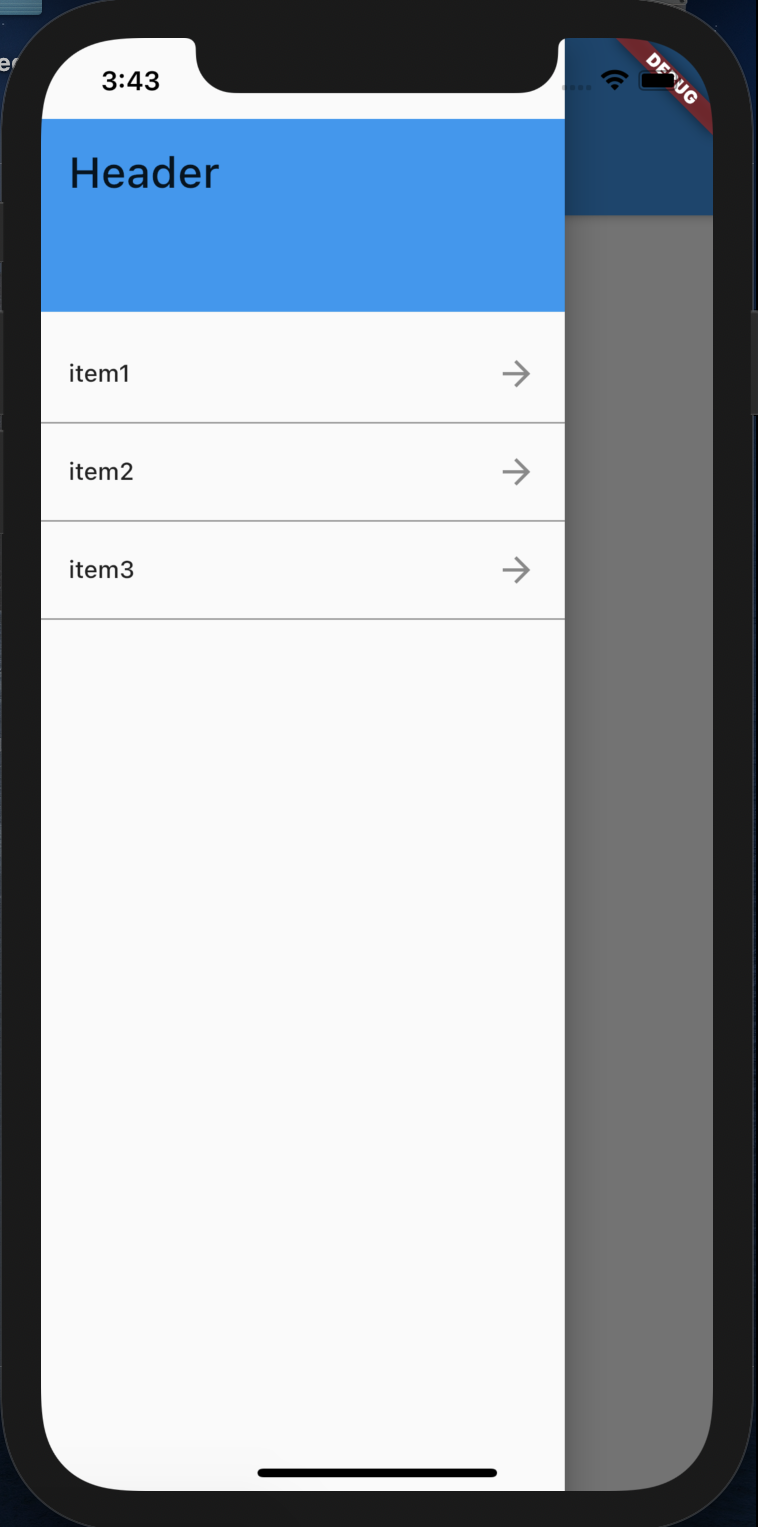
👇 Drawerを使った実装例です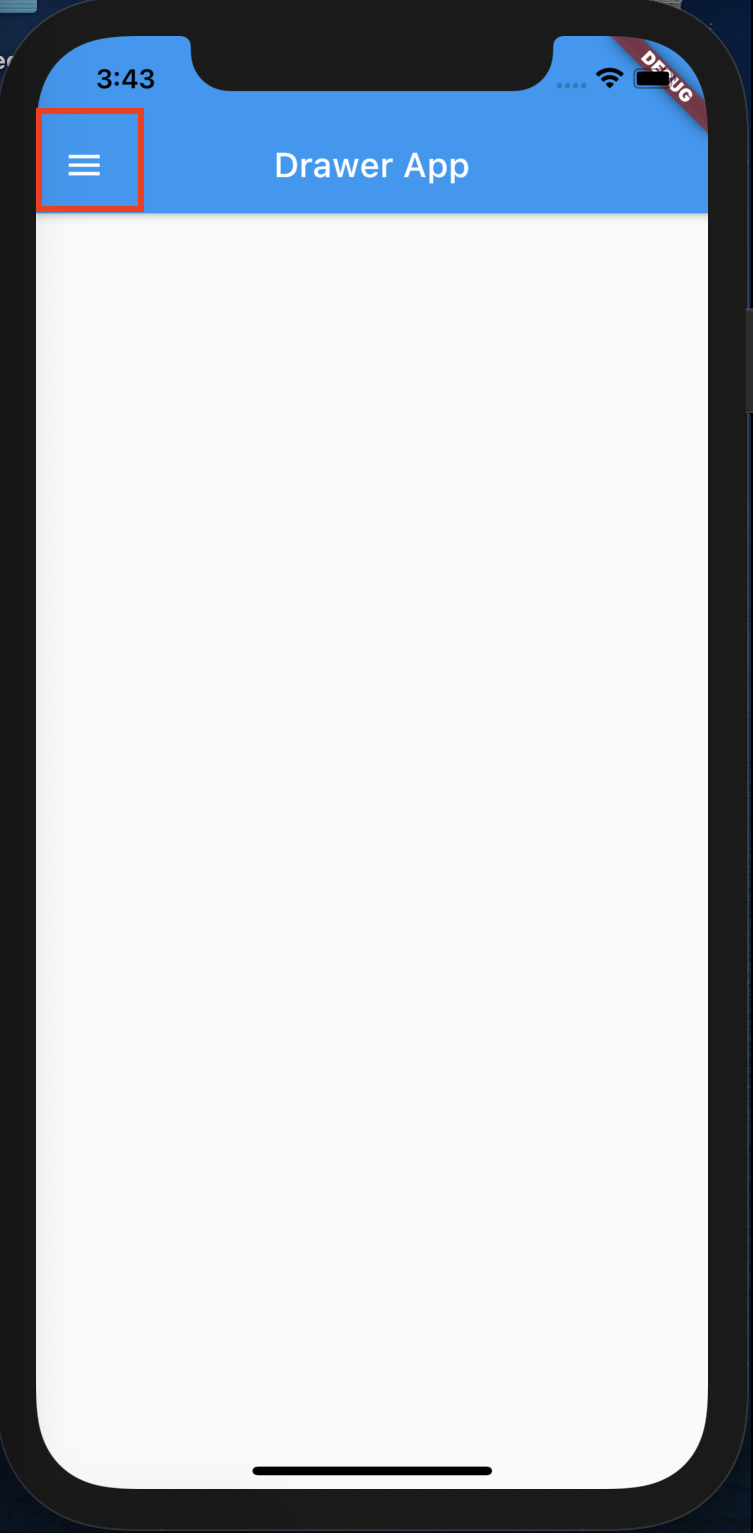
|
1 2 3 4 5 6 7 8 9 10 11 12 13 14 15 16 17 18 19 20 21 22 23 24 25 26 27 28 29 30 31 32 33 34 35 36 37 38 39 40 41 42 43 44 45 46 47 48 49 50 51 52 53 54 55 56 57 58 59 60 61 62 63 64 65 66 67 68 69 70 71 72 73 74 75 76 77 78 79 80 81 82 83 |
/* Drawer */ import 'package:flutter/material.dart'; void main() => runApp(MyApp()); class MyApp extends StatelessWidget { @override Widget build(BuildContext context) { return MaterialApp( title: 'DrawerHeader practice', home: DrawPage(), ); } } class DrawPage extends StatefulWidget { @override _DrawPageState createState() => _DrawPageState(); } class _DrawPageState extends State<DrawPage> { final List listTiles = <Widget>[ ListTile(title: Text('item1')), ListTile(title: Text('item2')), ListTile(title: Text('item3')), ]; @override Widget build(BuildContext context) { return Scaffold( appBar: AppBar(title: Text("Drawer App")), drawer: Drawer( child: ListView( children: <Widget>[ Container( child: DrawerHeader( child: Text( "Header", style: TextStyle(fontSize: 25), ), decoration: BoxDecoration(color: Colors.blue), ), height: 120), Container( child: ListTile( title: Text("item1"), trailing: Icon(Icons.arrow_forward), ), decoration: BoxDecoration( border: Border( bottom: BorderSide(color: Colors.grey), ), ), ), Container( child: ListTile( title: Text("item2"), trailing: Icon(Icons.arrow_forward), ), decoration: BoxDecoration( border: Border( bottom: BorderSide(color: Colors.grey), ), ), ), Container( child: ListTile( title: Text("item3"), trailing: Icon(Icons.arrow_forward), ), decoration: BoxDecoration( border: Border( bottom: BorderSide(color: Colors.grey), ), ), ), ], ), ), ); } } |
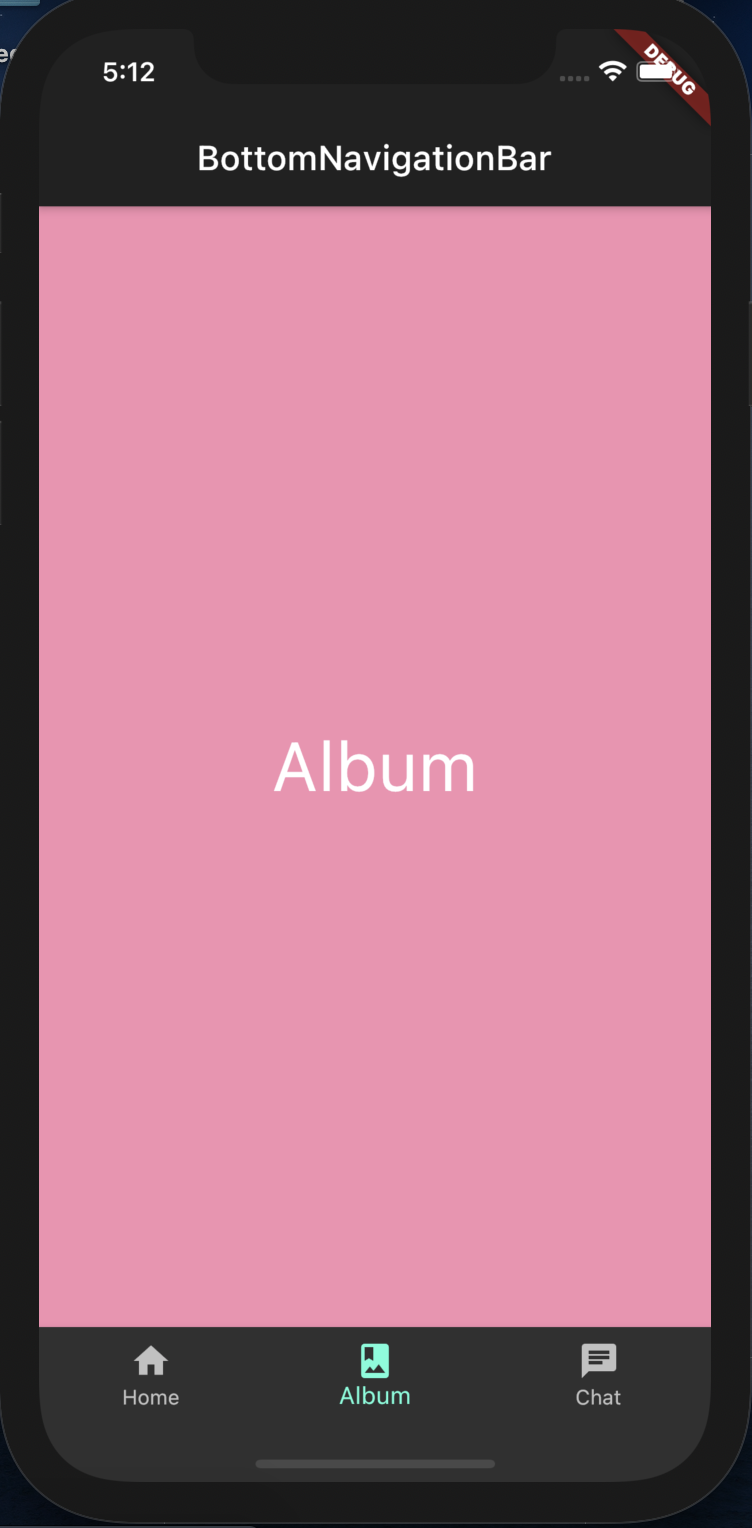
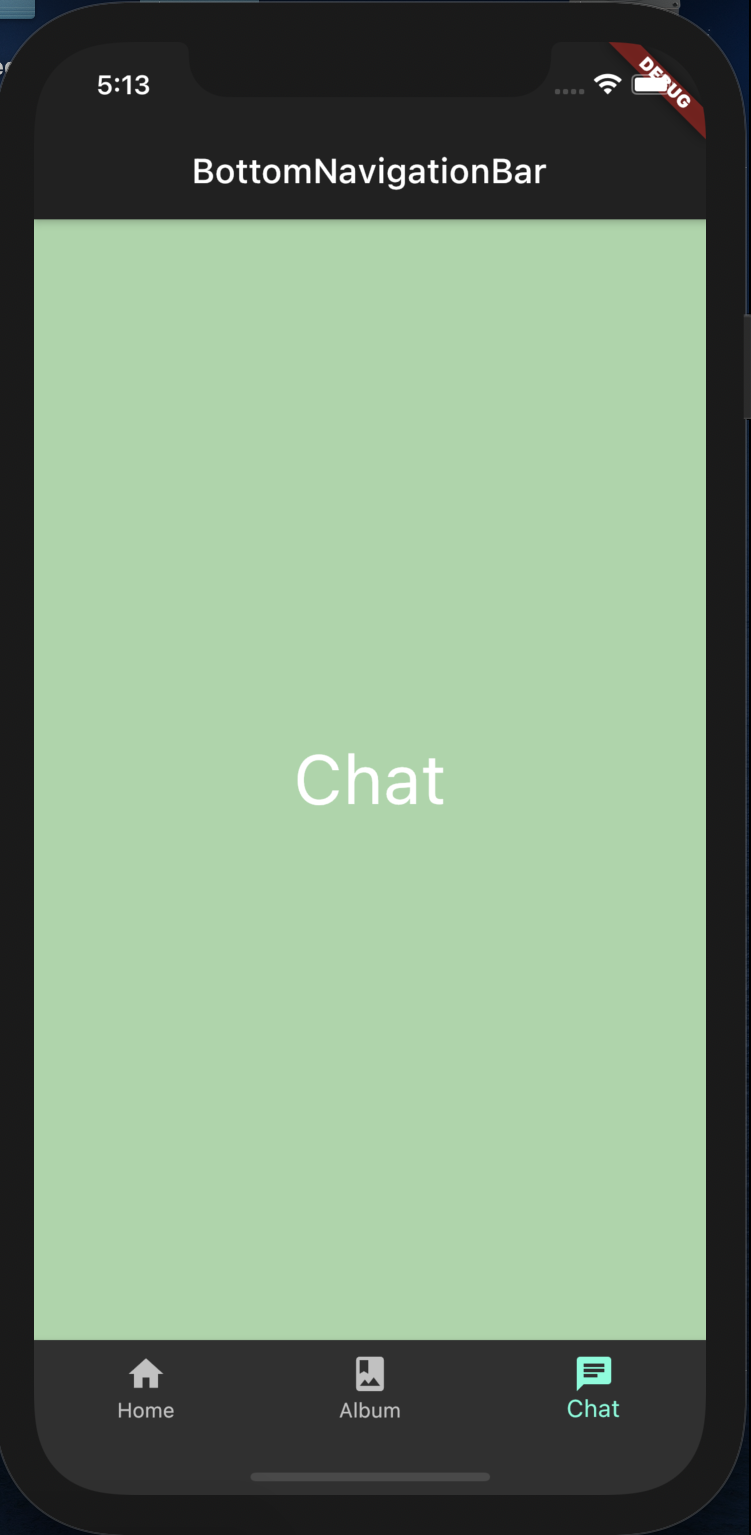
👇 BottomNavigationBarを使った実装例です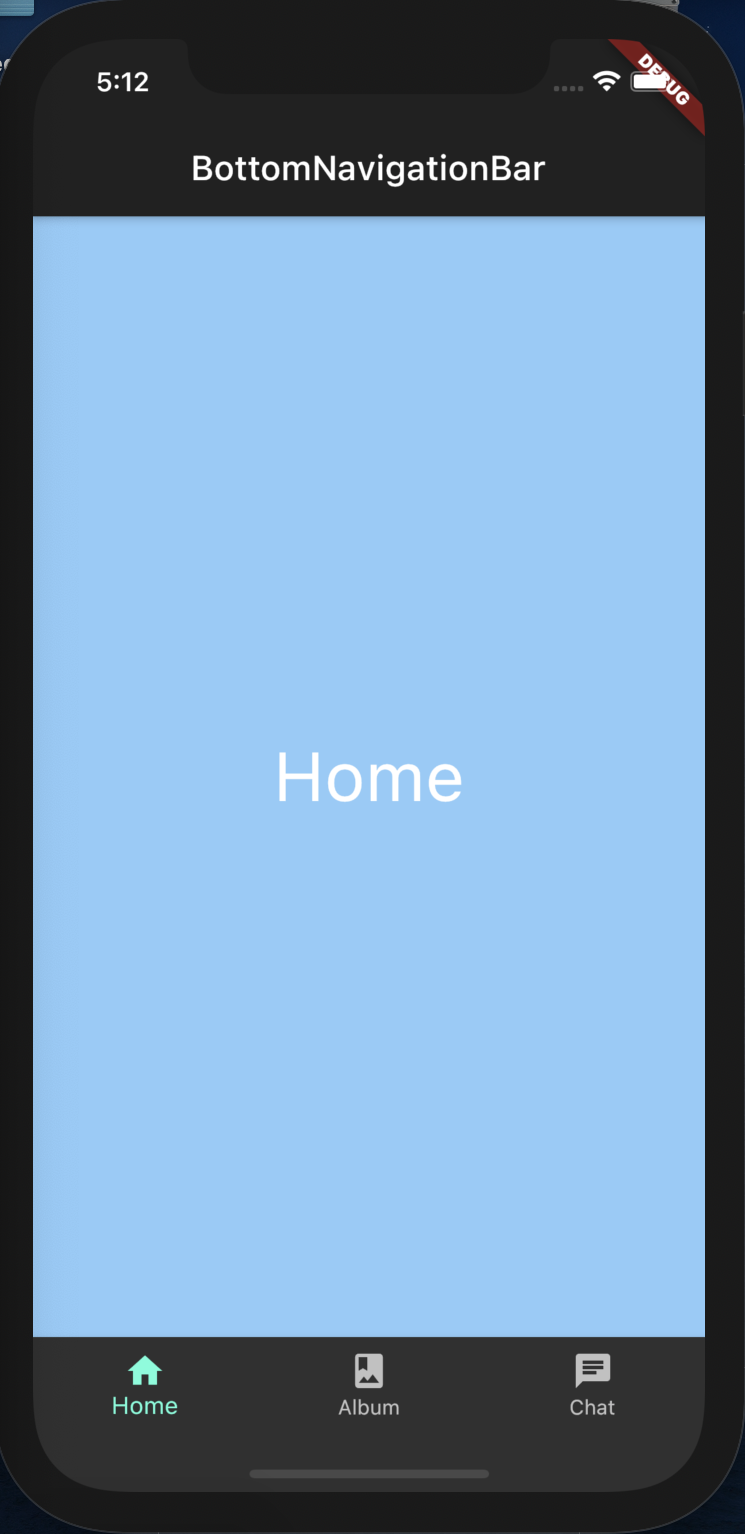
|
1 2 3 4 5 6 7 8 9 10 11 12 13 14 15 16 17 18 19 20 21 22 23 24 25 26 27 28 29 30 31 32 33 34 35 36 37 38 39 40 41 42 43 44 45 46 47 48 49 50 51 52 53 54 55 56 57 58 59 60 61 62 63 64 65 66 67 68 69 70 71 72 73 74 75 76 77 78 79 |
/* BottomNavigationBar */ import 'package:flutter/material.dart'; void main() => runApp(MyApp()); class MyApp extends StatelessWidget { @override Widget build(BuildContext context) { return MaterialApp( title: 'BottomNavigationBar', theme: ThemeData.dark(), home: MainPage(), ); } } class MainPage extends StatefulWidget { @override _MainPageState createState() => _MainPageState(); } class _MainPageState extends State<MainPage> { // どのナビゲーションバーが選択されているかを判断する変数を定義(その値を画面側に渡している) int _currentIndex = 0; // 下記で定義しているクラスのインスタンス化したものをリストに格納(返り値:Container) final _pageWidgets = [ PageWidget(color: Colors.blue[200], title: 'Home'), PageWidget(color: Colors.pink[200], title: 'Album'), PageWidget(color: Colors.green[200], title: 'Chat'), ]; @override Widget build(BuildContext context) { return Scaffold( appBar: AppBar( title: Text('BottomNavigationBar'), ), body: _pageWidgets[_currentIndex], bottomNavigationBar: BottomNavigationBar( items: <BottomNavigationBarItem>[ BottomNavigationBarItem(icon: Icon(Icons.home), title: Text('Home')), BottomNavigationBarItem( icon: Icon(Icons.photo_album), title: Text('Album')), BottomNavigationBarItem(icon: Icon(Icons.chat), title: Text('Chat')), ], currentIndex: _currentIndex, onTap: _onItemTapped, // fixedColor: Colors.blueAccent, // type: BottomNavigationBarType.fixed, ), ); } // ナビゲーションバーをタッチするとそのアイコンのindexが_currentIndexと等しくなる void _onItemTapped(int index) => setState(() => _currentIndex = index); } class PageWidget extends StatelessWidget { final Color color; final String title; PageWidget({Key key, this.color, this.title}) : super(key: key); @override Widget build(BuildContext context) { return Container( color: color, child: Center( child: Text( title, style: TextStyle( fontSize: 40, ), ), ), ); } } |
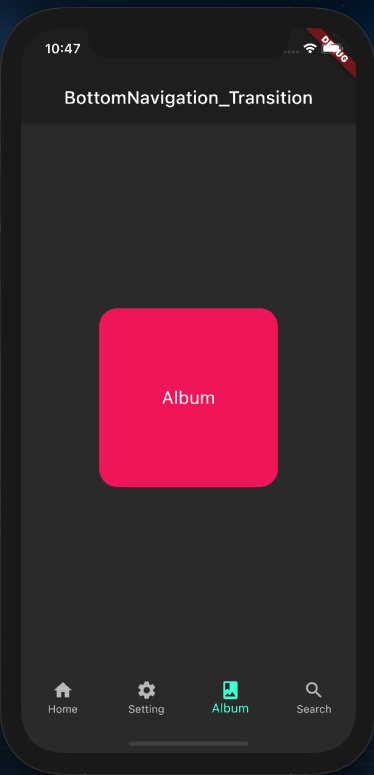
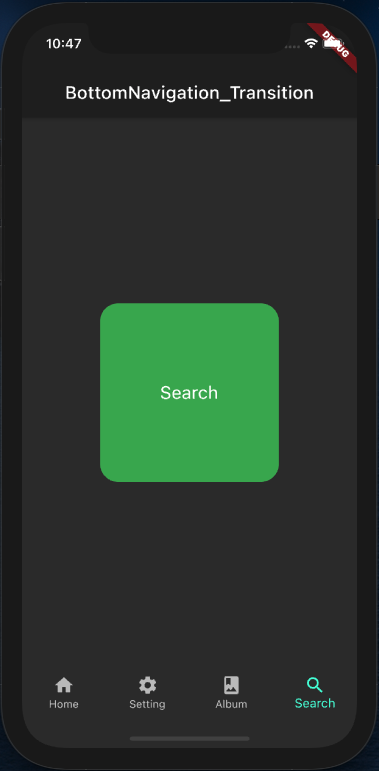
✅BottomNavigationBarのタッチと共に画面遷移を実装するには”PageView“と”PageController“を使う
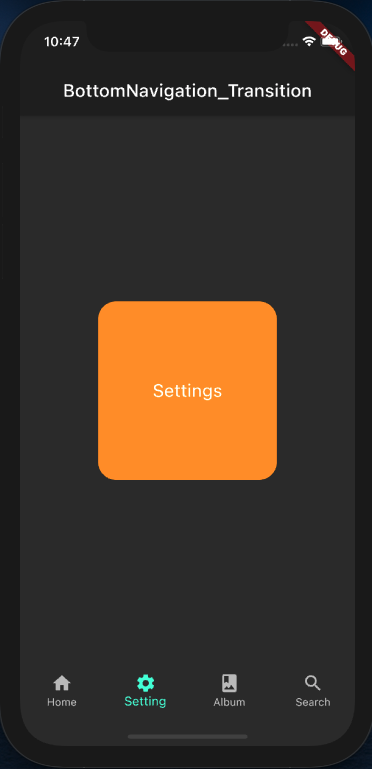
✅ ButtonNavigationBarはアイコンを4つ以上設定するとButtonNavigationBarType.shiftingがデフォルトで割り当てられるため、UIを変更したくない場合はButtonNavigationBarType.fixedを指定する
👇 BottomNavigationBarを使った実装例です(画面遷移ver)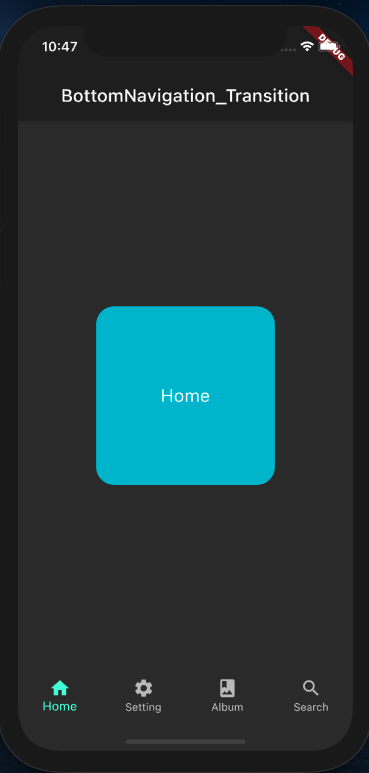
|
1 2 3 4 5 6 7 8 9 10 11 12 13 14 15 16 17 18 19 20 21 22 23 24 25 26 27 28 29 30 31 32 33 34 35 36 37 38 39 40 41 42 43 44 45 46 47 48 49 50 51 52 53 54 55 56 57 58 59 60 61 62 63 64 65 66 67 68 69 70 71 72 73 74 75 76 77 78 79 80 81 82 83 84 85 86 87 88 89 90 91 92 93 94 95 96 97 98 99 100 101 102 103 104 105 106 107 108 109 110 111 112 113 114 115 116 117 |
/* bottom_navifationbar_transition2 */ import 'package:flutter/material.dart'; void main() => runApp(MyApp()); class MyApp extends StatelessWidget { static const String _title = 'BottomNavigation_Transition'; @override Widget build(BuildContext context) { return MaterialApp( title: _title, theme: ThemeData.dark(), home: HomePage(), ); } } class HomePage extends StatefulWidget { @override _HomePageState createState() => _HomePageState(); } class _HomePageState extends State<HomePage> { int _selectedIndex = 0; PageController _pageController; static List<Widget> _pageList = [ CustomPage(pannelColor: Colors.cyan, title: "home"), CustomPage(pannelColor: Colors.orange, title: "Settings"), CustomPage(pannelColor: Colors.pink, title: "Album"), CustomPage(pannelColor: Colors.green, title: "Search"), ]; void _onPageChanged(int index) { setState(() { _selectedIndex = index; }); } @override void initState() { super.initState(); _pageController = PageController( initialPage: _selectedIndex, ); } @override void dispose() { super.dispose(); _pageController.dispose(); } @override Widget build(BuildContext context) { return Scaffold( appBar: AppBar( title: Text("BottomNavigation_Transition"), centerTitle: true), body: PageView( controller: _pageController, onPageChanged: _onPageChanged, children: _pageList, ), bottomNavigationBar: BottomNavigationBar( items: <BottomNavigationBarItem>[ BottomNavigationBarItem( icon: Icon(Icons.home), title: Text("home")), BottomNavigationBarItem( icon: Icon(Icons.settings), title: Text("Setting")), BottomNavigationBarItem( icon: Icon(Icons.photo_album), title: Text("Album")), BottomNavigationBarItem( icon: Icon(Icons.search), title: Text("Search")), ], currentIndex: _selectedIndex, // デフォルトでshiftingタイプが設定されてしまうため、fixedタプを指定 type: BottomNavigationBarType.fixed, onTap: (index) { _selectedIndex = index; _pageController.animateToPage(index, duration: Duration(milliseconds: 200), curve: Curves.easeInExpo); }, )); } } class CustomPage extends StatelessWidget { final Color pannelColor; final String title; // 引数必須の場合、@requiredアノテーションを付与する CustomPage({@required this.pannelColor, @required this.title}); @override Widget build(BuildContext context) { final titleTextStyle = Theme.of(context).textTheme.title; return Center( child: Container( width: 200, height: 200, decoration: BoxDecoration( color: pannelColor, borderRadius: BorderRadius.all(Radius.circular(20)), ), child: Center( child: Text(title, style: TextStyle( fontSize: titleTextStyle.fontSize, color: titleTextStyle.color, )), ), ), ); } } |
SliverAppBar
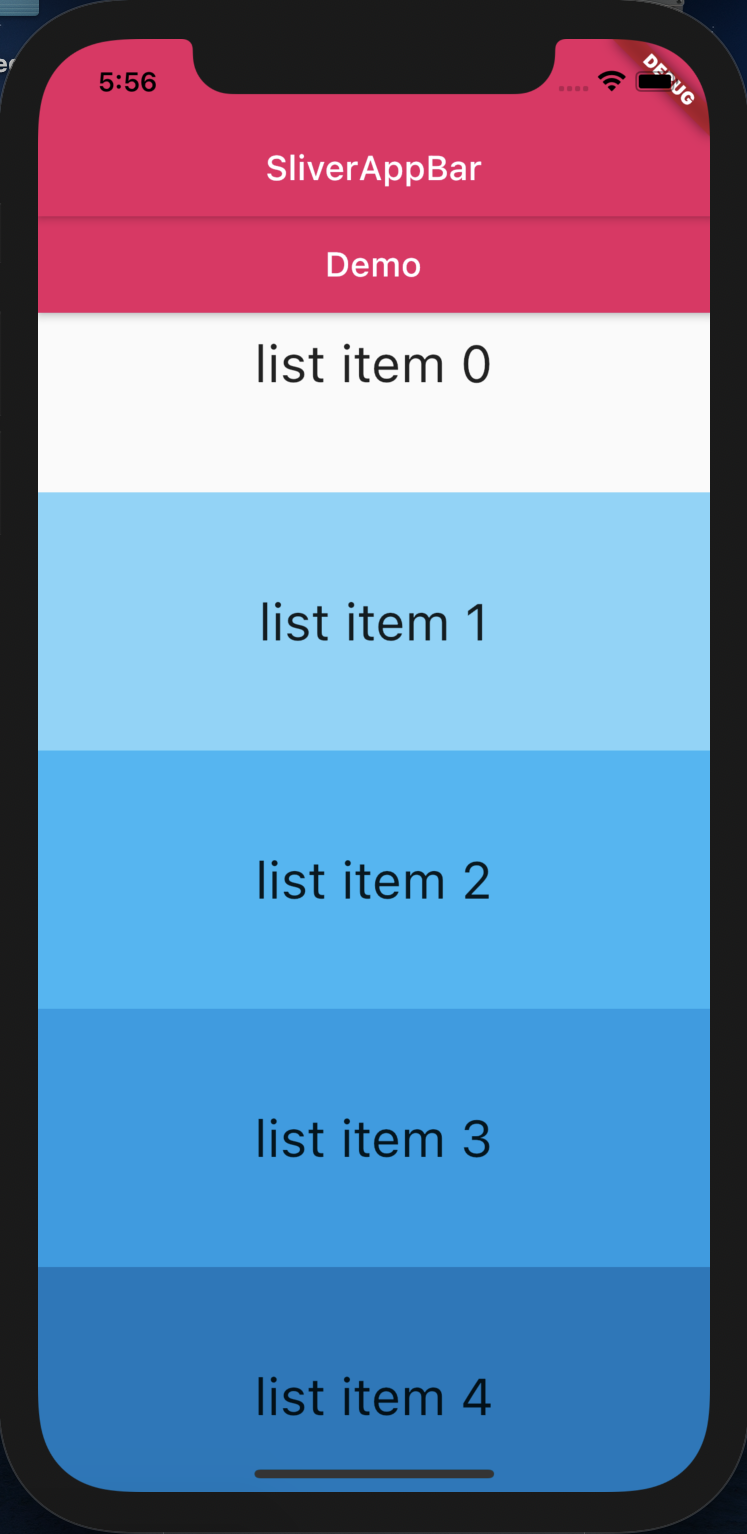
✅ 画面のスクロールに応じてヘッダー要素を縮小できるウィジェット
✅「SliverAppBar」の一覧要素には、リストとグリッドの2種類ある
👇SliverBarを使った実装例です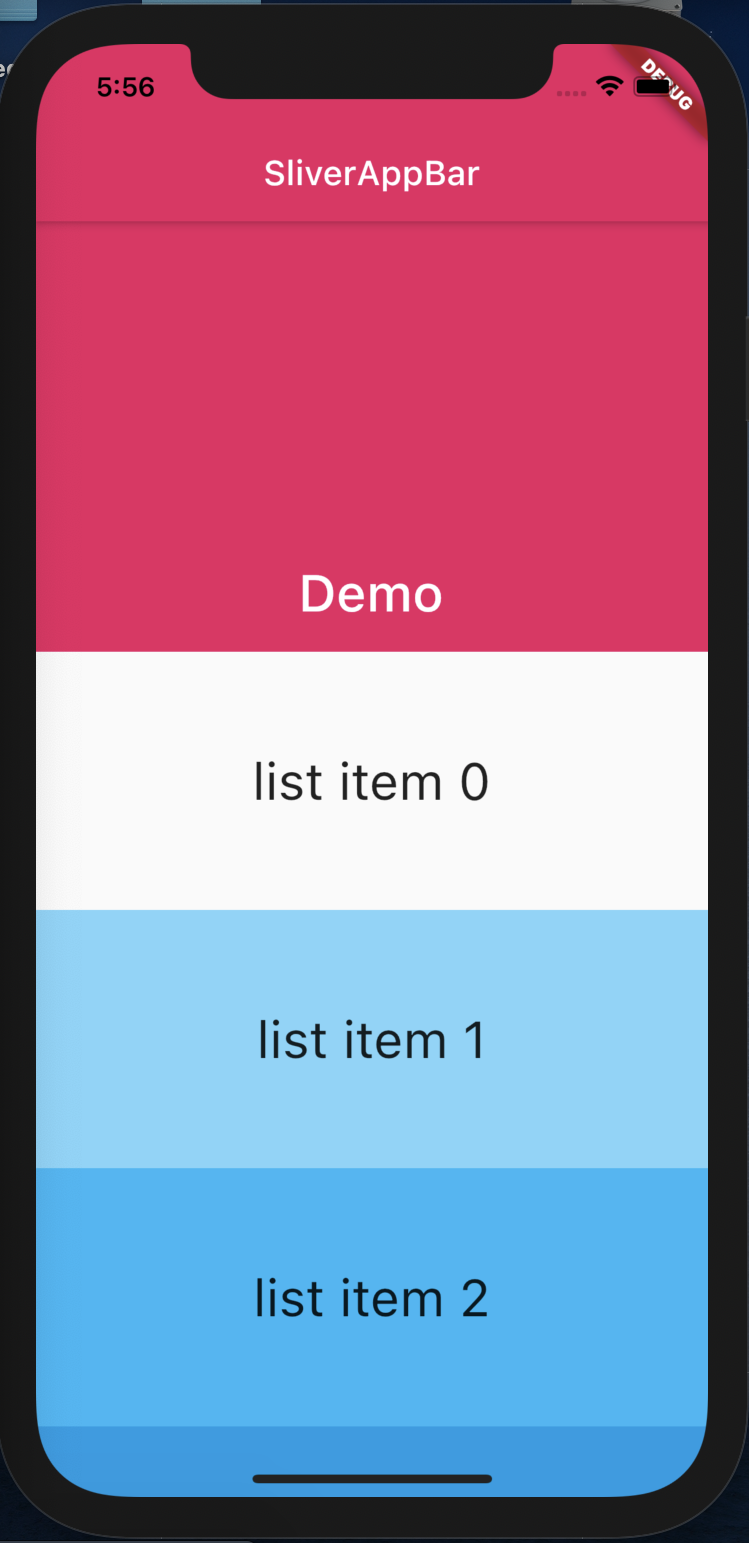
|
1 2 3 4 5 6 7 8 9 10 11 12 13 14 15 16 17 18 19 20 21 22 23 24 25 26 27 28 29 30 31 32 33 34 35 36 37 38 39 40 41 42 43 44 45 46 47 48 49 50 51 52 53 54 55 56 57 58 59 60 |
/* SliverAppBarBar */ import 'package:flutter/material.dart'; void main() => runApp(MyApp()); class MyApp extends StatelessWidget { @override Widget build(BuildContext context) { return MaterialApp( title: 'BottomNavigationBar', // theme: ThemeData.light(), theme: ThemeData(primarySwatch: Colors.pink), home: MainPage(), ); } } class MainPage extends StatefulWidget { @override _MainPageState createState() => _MainPageState(); } class _MainPageState extends State<MainPage> { Widget build(BuildContext context) { return Scaffold( appBar: AppBar( title: const Text('SliverAppBar'), ), body: CustomScrollView( slivers: <Widget>[ const SliverAppBar( floating: true, // リストの頭でなくても、上に酢ロールするとヘッダーを表示 pinned: true, //ヘッダーを非表示にせず、タイトルの1行分を残した状態で表示 snap: true, //ヘッダーがスクロールにより中途半端に表示されなくなり、一気に最大表示される expandedHeight: 250.0, flexibleSpace: FlexibleSpaceBar( title: Text('Demo'), ), ), SliverFixedExtentList( itemExtent: 150.0, delegate: SliverChildBuilderDelegate( (BuildContext context, int index) { return Container( alignment: Alignment.center, color: Colors.lightBlue[200 * (index % 5)], child: Text( 'list item $index', style: TextStyle(fontSize: 30), ), ); }, ), ), ], )); } } |
画面遷移の実装を整理する
✅ Flutterでの画面遷移の実装はNavigatorを使う
✅ 画面遷移の実装では以下の構造を頭に入れといてメソッドの選択をしていくと⭕️
矢印→画面の遷移方向、ボックス→画面、緑→画面遷移イベント、オレンジ→Navigatorメソッド
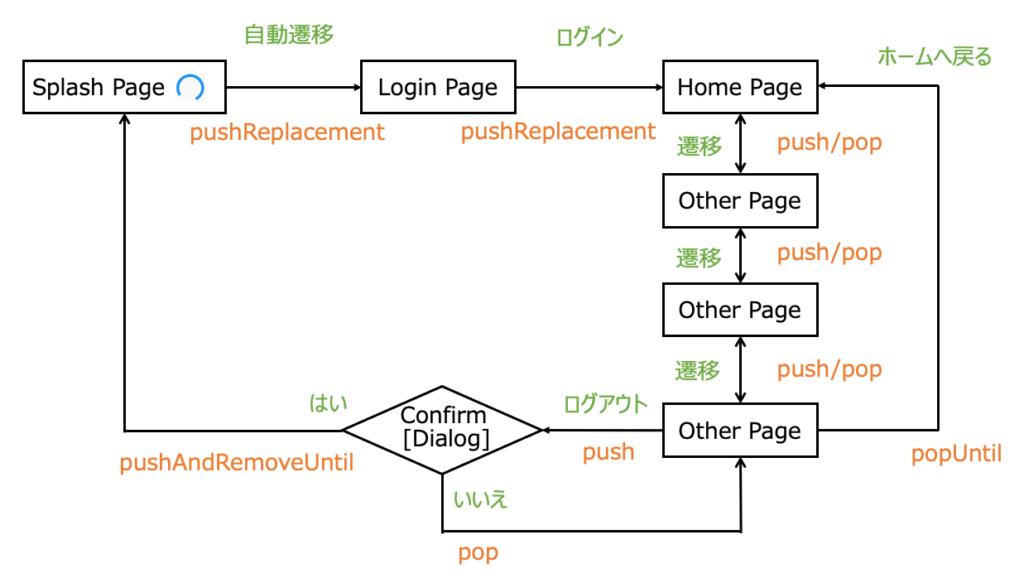
✅ スプラッシュ画面→ログイン画面→ホームページ画面の遷移は、基本的に一方通行で戻る必要がないので、pushReplacementを使用する
✅ 遷移すると前画面が遷移後の画面に置き換わるので、元の画面に戻る必要がない時に使用する
✅ ホーム画面前のログイン画面には戻れないようになるため、ログイン後はホーム画面が画面スタックのルート画面となる
|
1 2 3 4 5 6 7 |
Navigator.of(context).pushReplacementNamed('/login'); //または Navigator.of(context).pushReplacement( MaterialPageRoute( builder: (context) =>LogInPage(), ), ); |
✅ ホーム画面から他のページに自由に行き来(遷移)できるようにするためには次の画面遷移にはpush、元の画面に戻るときはpopを使用する
✅ Flutterではpushで遷移すると戻るボタンや指でのスライドで元画面に遷移することが可能
|
1 2 3 4 5 6 7 |
Navigator.of(context).pushNamed("/otherpage"); //または Navigator.push( context, MaterialPageRoute(builder: (context) => const OtherPage()), ); |
✅ popメソッドでスタックした画面を全てクリアして指定した画面まで戻りたい場合は、popUntilを使用する
✅ 第二引数のModalRoute.withNameメソッドに、遷移したい(Popを止めたい)urlを渡す
|
1 |
Navigator.popUntil(context, ModalRoute.withName('/login')); |
✅ ログインボタンや登録ボタンがタップされた時の確認でダイアログを表示したい場合にはshowDialogメソッドを使う
✅ ダイアログを閉じる場合にはonPressedメソッドでNavigator.popを呼んであげます
|
1 2 3 4 5 6 7 8 9 10 11 12 13 14 15 16 17 18 19 20 21 22 23 |
Future showAlertDialog(BuildContext context) async { return showDialog<void>( context: context, barrierDismissible: false, builder: (BuildContext context) { return AlertDialog( title: Text('画面を遷移しますか?'), content: Text('Please describe the details here.'), actions: <Widget>[ TextButton( child: Text('いいえ'), onPressed: () => Navigator.of(context).pop(), ), TextButton( child: Text('はい'), onPressed: () => Navigator.of(context).pushNamed('/otherpage'), ), ], ); }, ); } |
✅ ログアウトなど、今までスタックしていた全ての画面を破棄してスプラッシュ画面に画面遷移したい時はpushAndRemoveUntilを使用する
✅ 第二引数のpredicateをfalseにすることでスタックは全て消される
|
1 2 3 4 5 |
//指定した画面(/splash)まで削除した上で、指定した画面(ここでは/homepage)に遷移する navigator.pushNamedAndRemoveUntil(context, '/splash',ModalRoute.withName('/homepage')); //または Navigator.pushAndRemoveUntil(context, MaterialPageRoute( builder: (context) => new SplashPage()),(_) => false); |
“画面遷移について”は以上になります、いかがだったでしょうか?
【Flutter/Dart④~⑦】で様々なウィジェットを見てきましたが、これはあくまで一例でUIを作るウィジェットは本当に数多く存在します。
FlutterではサンプルUIを提供していて、そのコードを確認することができます。自分のイメージするUIを作る時アイデアや、アプリ開発のヒントが欲しい時にかなり参考になるので、見てみて下さい👇
https://flutter.github.io/samples/#
次回は”インタラクティブなWidget”について学習していきたいと思います、楽しみにしてて下さいね!
今回はこの辺で、ばいばい👋











コメントを残す