さあ今回は”インタラクティブなWidget”の使い方について学んでいこう!!
前回までは”レイアウト”についてまとめてきました👇
【Flutter/Dart⑤】Flutterのレイアウトについて
レイアウトを表現するWidgetは本当に数多くの種類が存在しますが、インタラクティブなWidgetの同じことが言えます。
全て覚える必要はなく、一度そのWidgetを作ってみて知ることで実装の引き出しを増やすことが大切だと思います。動きをしっかり理解し、”まずは触ってみる“をどんどん実践していこう!
Button
✅基本的なボタン表示用Widgetとしては以下の3種類があります。
- TextButton:影のないボタン
- OutlinedButton:枠線のあるボタン
- Elevated Button:影のあるボタン
👇3つのボタンの実装例になります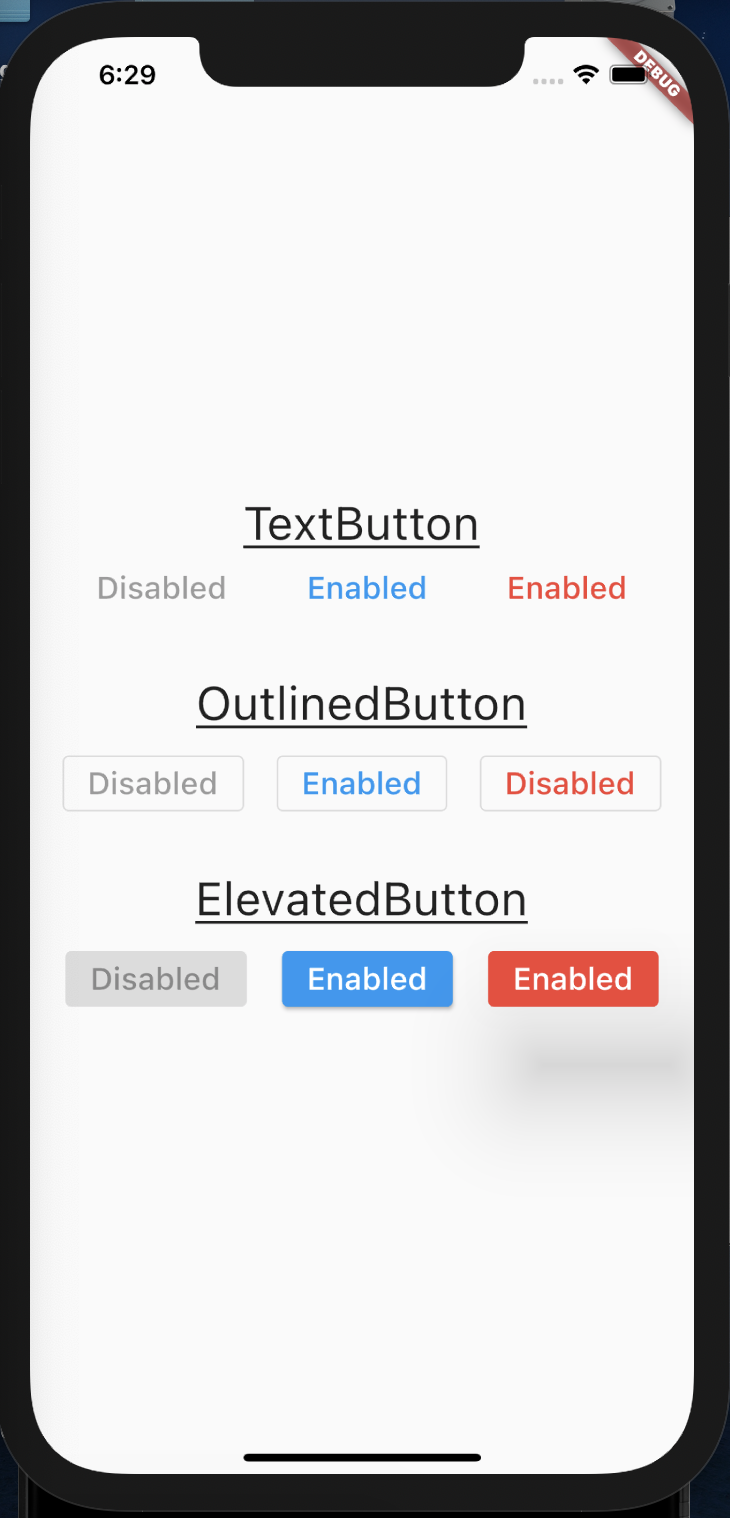
|
1 2 3 4 5 6 7 8 9 10 11 12 13 14 15 16 17 18 19 20 21 22 23 24 25 26 27 28 29 30 31 32 33 34 35 36 37 38 39 40 41 42 43 44 45 46 47 48 49 50 51 52 53 54 55 56 57 58 59 60 61 62 63 64 65 66 67 68 69 70 71 72 73 74 75 76 77 78 79 80 81 82 83 84 85 86 87 88 89 90 91 92 93 94 95 96 97 98 99 100 101 102 103 104 105 106 107 108 109 110 111 112 113 114 115 116 117 118 119 120 121 122 123 124 125 126 127 128 129 |
/* TextButton, OutlinedButton, ElevatedButton */ import 'package:flutter/material.dart'; import 'package:my_widgets_app/main_src.dart'; void main() => runApp(MyApp()); class MyApp extends StatelessWidget { Widget build(BuildContext context) { return MaterialApp( title: 'Button practice', // theme: ThemeData.dark(), theme: ThemeData(primarySwatch: Colors.blue), home: Scaffold( body: Column( mainAxisAlignment: MainAxisAlignment.center, children: <Widget>[ Container( child: Text( 'TextButton', style: TextStyle( fontSize: 30, decoration: TextDecoration.underline), ), ), Row( mainAxisAlignment: MainAxisAlignment.spaceEvenly, children: <Widget>[ TextButton( onPressed: null, child: Text( 'Disabled', style: TextStyle(fontSize: 20), ), ), TextButton( onPressed: () {}, child: Text( 'Enabled', style: TextStyle(fontSize: 20), ), ), TextButton( onPressed: () {}, child: Text( 'Enabled', style: TextStyle(fontSize: 20), ), style: TextButton.styleFrom(primary: Colors.red), ), ], ), Container( child: Text( 'OutlinedButton', style: TextStyle( fontSize: 30, decoration: TextDecoration.underline), ), padding: EdgeInsets.only(top: 32, bottom: 10), ), Row( mainAxisAlignment: MainAxisAlignment.spaceEvenly, children: <Widget>[ OutlinedButton( onPressed: null, child: Text( 'Disabled', style: TextStyle(fontSize: 20), ), ), OutlinedButton( onPressed: () {}, child: Text( 'Enabled', style: TextStyle(fontSize: 20), ), ), OutlinedButton( onPressed: () {}, child: Text( 'Disabled', style: TextStyle(fontSize: 20, color: Colors.red), ), ), ], ), Container( child: Text( 'ElevatedButton', style: TextStyle( fontSize: 30, decoration: TextDecoration.underline), ), padding: EdgeInsets.only(top: 32, bottom: 10), ), Row( mainAxisAlignment: MainAxisAlignment.spaceEvenly, children: <Widget>[ ElevatedButton( onPressed: null, child: Text( 'Disabled', style: TextStyle(fontSize: 20), ), ), ElevatedButton( onPressed: () {}, child: Text( 'Enabled', style: TextStyle(fontSize: 20), ), ), ElevatedButton( onPressed: () {}, child: Text( 'Enabled', style: TextStyle(fontSize: 20), ), style: ElevatedButton.styleFrom( primary: Colors.red, elevation: 50, // ボタンの影の深さ ), ), ], ), ], ), ), ); } } |
👇ボタンをクリックすると数字がインクリメントされるコードの実装例です。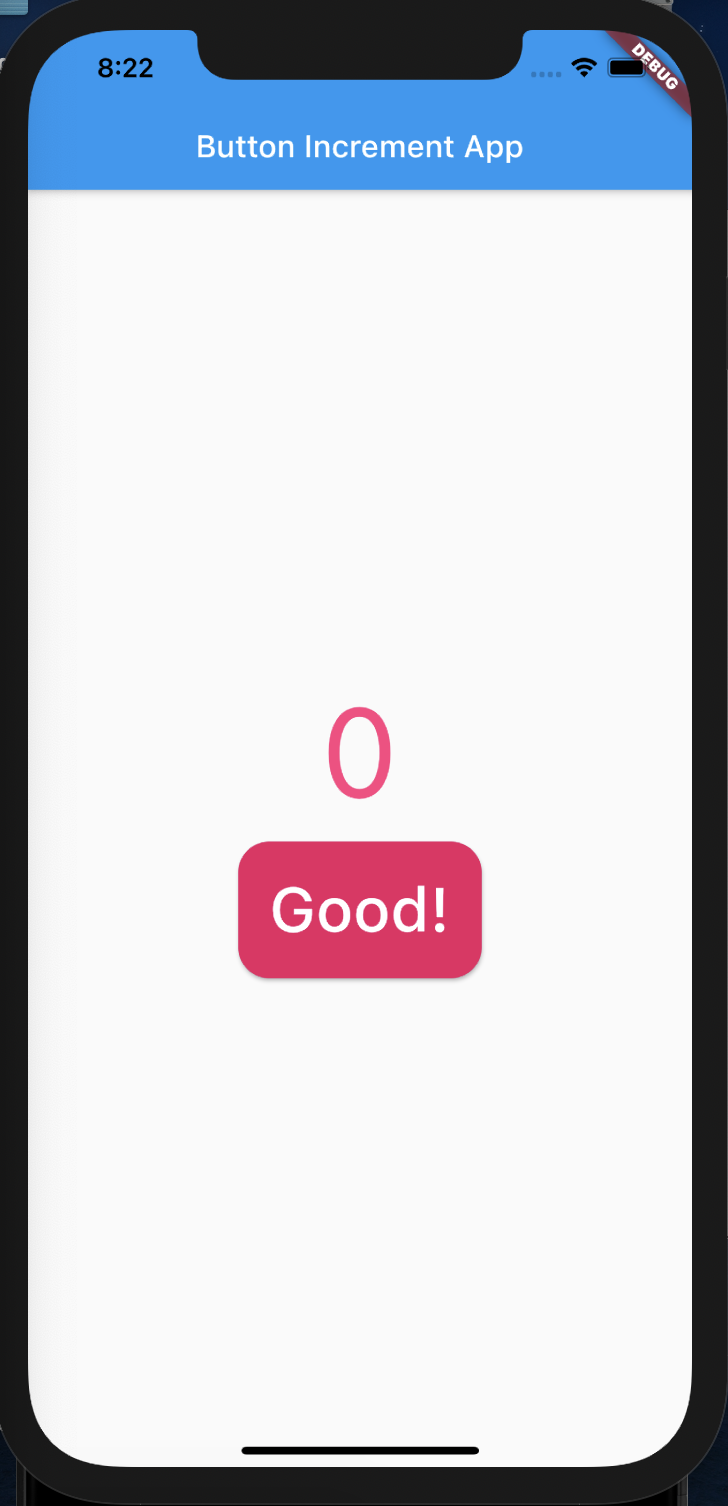
|
1 2 3 4 5 6 7 8 9 10 11 12 13 14 15 16 17 18 19 20 21 22 23 24 25 26 27 28 29 30 31 32 33 34 35 36 37 38 39 40 41 42 43 44 45 46 47 48 49 50 51 52 53 54 55 56 57 58 59 60 61 62 63 64 65 66 67 68 69 70 |
/* button_increment */ import 'package:flutter/material.dart'; void main() => runApp(MyApp()); class MyApp extends StatelessWidget { Widget build(BuildContext context) { return MaterialApp( title: 'button_increment', home: Scaffold( appBar: AppBar( title: Text('Button Increment App'), ), body: Center( child: PlusApp(), ), ), ); } } class PlusApp extends StatefulWidget { @override _PlusAppState createState() => _PlusAppState(); } class _PlusAppState extends State<PlusApp> { int _count = 0; void _handlePressed() { // 状態を保持する変数を変更する処理は、setState内に記述 setState(() { _count++; }); } Widget build(BuildContext context) { return Container( child: Column( mainAxisAlignment: MainAxisAlignment.center, children: <Widget>[ Text( "$_count", style: TextStyle( color: Colors.pinkAccent, fontSize: 80.0, ), ), Padding(padding: EdgeInsets.only(top: 10)), ElevatedButton( onPressed: _handlePressed, child: Text( "Good!", style: TextStyle( fontSize: 40.0, ), ), style: ElevatedButton.styleFrom( primary: Colors.pink, padding: EdgeInsets.all(20), shape: RoundedRectangleBorder( borderRadius: BorderRadius.circular(20))), ) ], ), ); } } |
※余談ですが、GitHub GistとDartPadを連携させることによりこのようにWordPressに埋め込むことができます👇
IconButton
✅アイコンボタンの実装は” IconButton “を使う
✅アイコンボタンにテキストを埋め込んでの実装は以下の3つ
① TextButton.icon
② OutlineButton.icon
③ ElevatedButton.icon
👇Iconボタン、テキストを埋め込んだアイコンボタンの実装例です![]()
|
1 2 3 4 5 6 7 8 9 10 11 12 13 14 15 16 17 18 19 20 21 22 23 24 25 26 27 28 29 30 31 32 33 34 35 36 37 38 39 40 41 42 43 44 45 46 47 48 49 50 51 52 53 54 55 56 57 58 59 60 61 62 63 64 65 66 67 68 69 70 71 72 73 74 75 76 77 78 79 80 81 82 83 84 85 86 87 88 89 90 91 92 93 94 95 96 97 98 |
/* Icon variation */ import 'package:flutter/material.dart'; void main() => runApp(MyIconApp()); class MyIconApp extends StatelessWidget { Widget build(BuildContext context) { return MaterialApp( title: "Icon practice App", theme: ThemeData( brightness: Brightness.dark, ), home: Scaffold( appBar: AppBar( title: Text('Icon variation App'), ), body: Column( mainAxisAlignment: MainAxisAlignment.center, children: <Widget>[ Container( child: Text( 'IconBtton', style: TextStyle( fontSize: 30, decoration: TextDecoration.underline, ), ), padding: EdgeInsets.only(bottom: 10), ), Row( mainAxisAlignment: MainAxisAlignment.spaceAround, children: <Widget>[ IconButton( color: Colors.blue, onPressed: () {}, icon: Icon(Icons.thumb_up), iconSize: 50, ), IconButton( color: Colors.pink, onPressed: () {}, icon: Icon(Icons.favorite), iconSize: 50, ), IconButton( onPressed: () {}, icon: Icon(Icons.flight), iconSize: 60, ), ], ), Container( child: Text( 'Icon & Text Button', style: TextStyle( fontSize: 30, decoration: TextDecoration.underline, ), ), padding: EdgeInsets.only(top: 20, bottom: 30), ), Row( mainAxisAlignment: MainAxisAlignment.spaceAround, children: <Widget>[ TextButton.icon( onPressed: () {}, icon: Icon(Icons.thumb_up), label: Text( 'Good!', style: TextStyle(fontSize: 20), )), OutlinedButton.icon( onPressed: () {}, icon: Icon( Icons.favorite, color: Colors.pink, ), label: Text( 'Like!', style: TextStyle(fontSize: 20, color: Colors.pink), )), ElevatedButton.icon( onPressed: () {}, icon: Icon(Icons.flight), label: Text( 'Flight!', style: TextStyle(fontSize: 20), )), ], ), ], ), ), ); } } |
FloatingActionButton
✅ マテリアルデザインを採用したフローティングボタンは” FloatingActionButton “を使う
👇フローティングアイコンボタンの実装例です![]()
|
1 2 3 4 5 6 7 8 9 10 11 12 13 14 15 16 17 18 19 20 21 22 |
/* FloatingActionButton */ import 'package:flutter/material.dart'; void main() => runApp(MyApp()); class MyApp extends StatelessWidget { @override Widget build(BuildContext context) { return MaterialApp( title: 'FloatingActionButton', theme: ThemeData.light(), home: Scaffold( floatingActionButton: FloatingActionButton( backgroundColor: Colors.green, onPressed: () {}, child: Icon(Icons.add), ), ), ); } } |
TextField
👇キーボードで入力し、表示させるアプリケーションの実装例です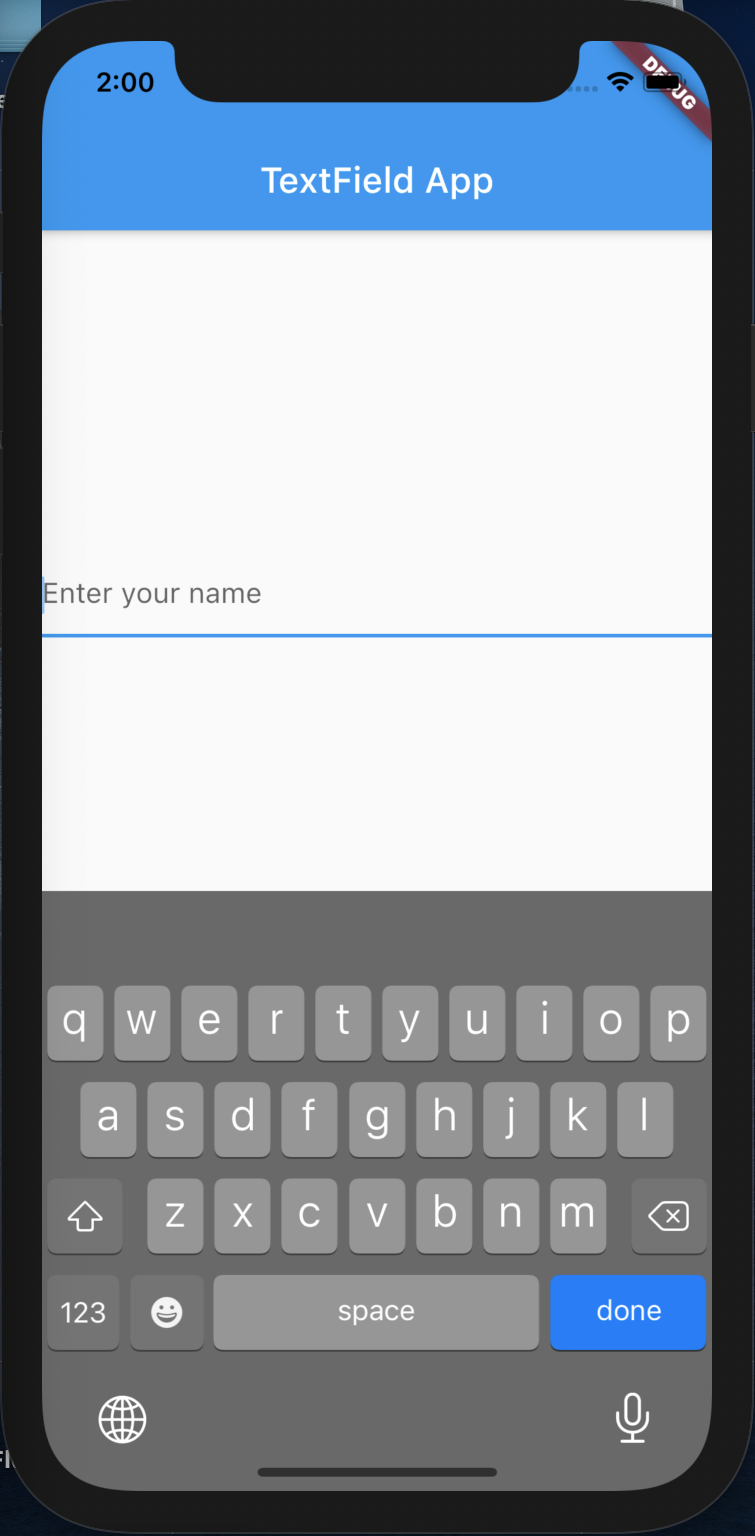
|
1 2 3 4 5 6 7 8 9 10 11 12 13 14 15 16 17 18 19 20 21 22 23 24 25 26 27 28 29 30 31 32 33 34 35 36 37 38 39 40 41 42 43 44 45 46 47 48 49 50 51 52 53 54 55 56 57 58 59 60 |
/* TextField */ import 'package:flutter/material.dart'; void main() => runApp(MyApp()); class MyApp extends StatelessWidget { @override Widget build(BuildContext context) { return MaterialApp( title: 'TextField App', theme: ThemeData.light(), home: Scaffold( appBar: AppBar(title: Text("TextField App")), body: Center( child: MyTextForm(), ), ), ); } } class MyTextForm extends StatefulWidget { @override _MyTextFormState createState() => _MyTextFormState(); } class _MyTextFormState extends State<MyTextForm> { String _text = ''; void _handleText(String input) { setState(() { _text = input; }); } Widget build(BuildContext context) { return Container( child: Column( mainAxisAlignment: MainAxisAlignment.center, children: <Widget>[ Text( "$_text", style: TextStyle( color: Colors.pinkAccent, fontWeight: FontWeight.bold, fontSize: 30, ), ), TextField( onChanged: _handleText, style: TextStyle(color: Colors.orange), decoration: InputDecoration(hintText: 'Enter your name'), autofocus: true, //画面を開いた瞬間にTextFieldにフォーカスし、キーボードが開く ) ], ), ); } } |
Switch
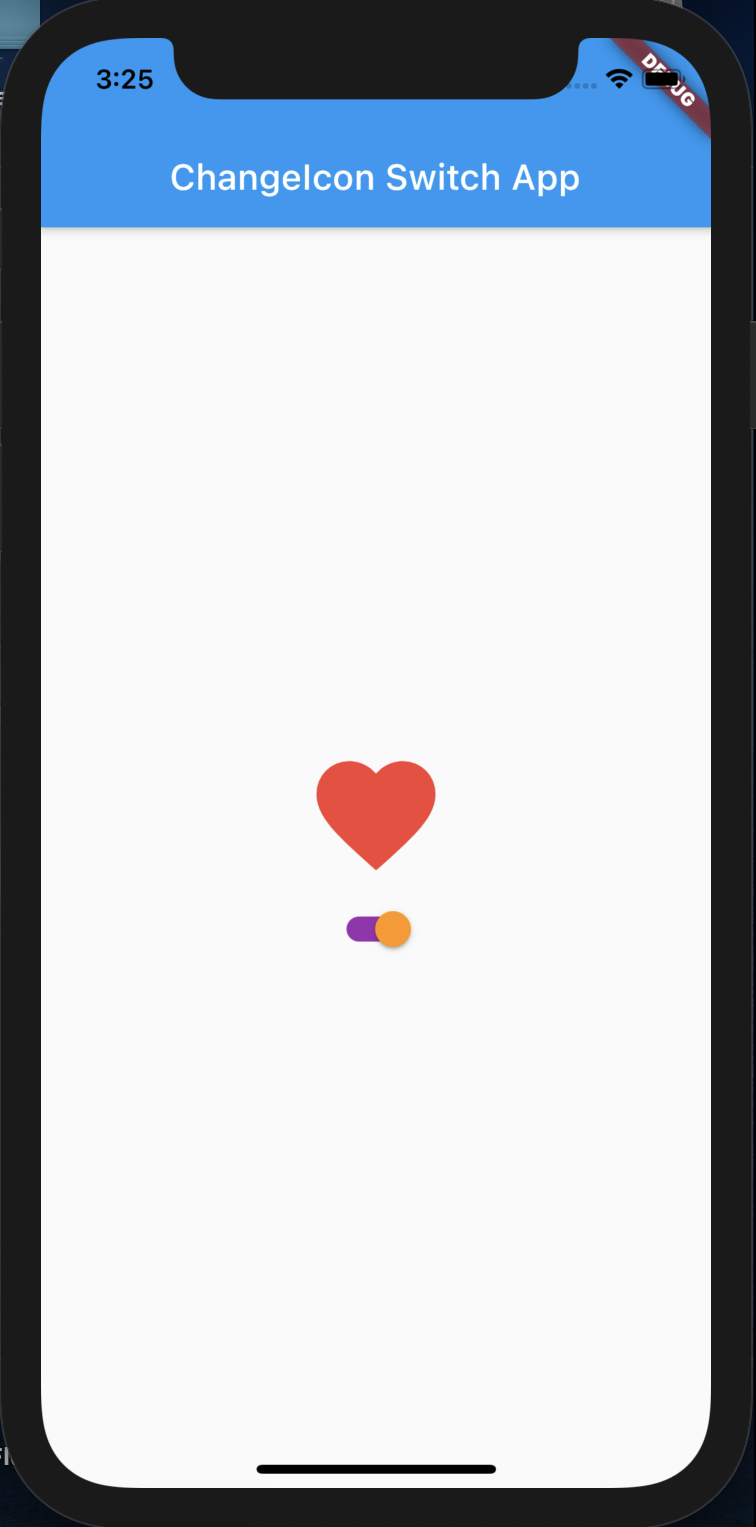
👇 スイッチを押すと、アイコン表示を変化させるアプリケーションの実装例です。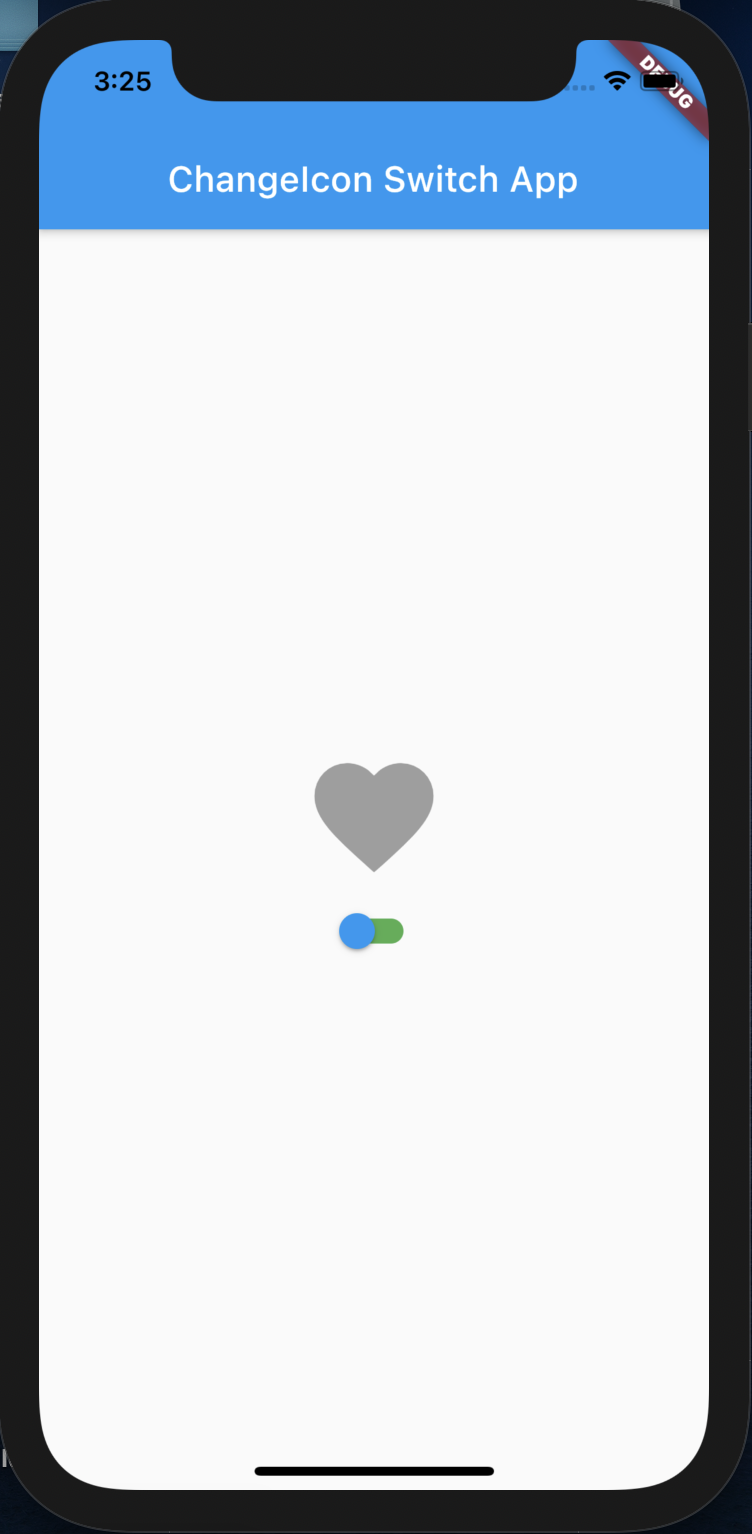
|
1 2 3 4 5 6 7 8 9 10 11 12 13 14 15 16 17 18 19 20 21 22 23 24 25 26 27 28 29 30 31 32 33 34 35 36 37 38 39 40 41 42 43 44 45 46 47 48 49 50 51 52 53 54 55 56 57 58 59 60 |
/* Switch Icon */ import 'package:flutter/material.dart'; void main() => runApp(MyApp()); class MyApp extends StatelessWidget { @override Widget build(BuildContext context) { return MaterialApp( title: 'Swatch paractice', theme: ThemeData.light(), home: Scaffold( appBar: AppBar( title: Text('ChangeIcon Switch App'), ), body: Center( child: ChangeIcon(), )), ); } } class ChangeIcon extends StatefulWidget { @override _ChangeIconState createState() => _ChangeIconState(); } class _ChangeIconState extends State<ChangeIcon> { bool _active = false; void _changeIcon(bool e) => setState(() => _active = e); // void _changeIcon(bool e) { // setState(() { // _active = e; // }); // } Widget build(BuildContext context) { return Container( child: Column( mainAxisAlignment: MainAxisAlignment.center, children: <Widget>[ Icon( Icons.favorite, color: _active ? Colors.red : Colors.grey, size: 80, ), Switch( value: _active, onChanged: _changeIcon, activeColor: Colors.orange, activeTrackColor: Colors.purple, inactiveThumbColor: Colors.blue, inactiveTrackColor: Colors.green, ) ], ), ); } } |
Slider
label: スライダーを動かしている時に表示されるラベルmin: 最小値max: 最大値value: スライダーの値(double)activeColor: スライダーの選択範囲の線の色inactiveColor: スライダーの未選択範囲の線の色divisions: メモリの数値を決めるための値で、(max - min) / divisionsの計算で値が決定onChanged: 値を変更した時に動作onChangeStart: 値を変更開始した時に動作onChangeEnd: 値を変更終了した時に動作
👇スライドを動かすと、表示してる値が増えていくアプリケーションの実装例です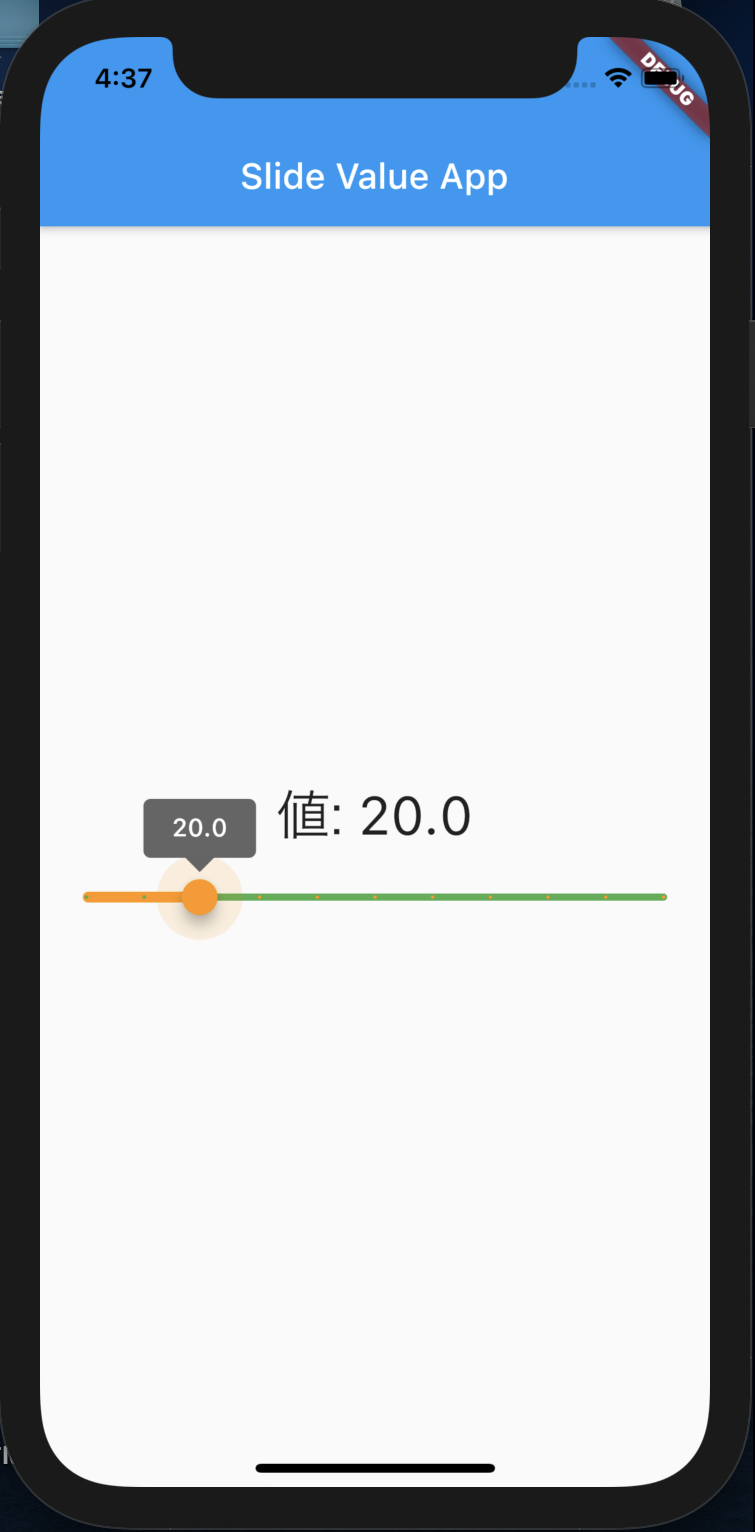
|
1 2 3 4 5 6 7 8 9 10 11 12 13 14 15 16 17 18 19 20 21 22 23 24 25 26 27 28 29 30 31 32 33 34 35 36 37 38 39 40 41 42 43 44 45 46 47 48 49 50 51 52 53 |
/* Slider */ import 'package:flutter/material.dart'; void main() => runApp(MyApp()); class MyApp extends StatelessWidget { @override Widget build(BuildContext context) { return MaterialApp( title: 'Slide Practice App', home: Scaffold( appBar: AppBar(title: Text('Slide Value App')), body: Center(child: SlideForm()), ), ); } } class SlideForm extends StatefulWidget { @override _SlideFormState createState() => _SlideFormState(); } class _SlideFormState extends State<SlideForm> { double _value = 0.0; void _changeValue(double e) => setState(() => _value = e); Widget build(BuildContext context) { return Container( child: Column( mainAxisAlignment: MainAxisAlignment.center, children: <Widget>[ Text( '値: ${_value}', style: TextStyle(fontSize: 30), ), Slider( min: 0, max: 100, divisions: 10, label: '${_value}', value: _value, onChanged: _changeValue, activeColor: Colors.orange, inactiveColor: Colors.green, ), ], ), ); } } |
“【Flutter/Dart⑥】インタラクティブなWidgetについて”は以上になります、いかがだったでしょうか?
次回は”画面遷移”について学習していきたいと思います、楽しみにしてて下さいね!
今回はこの辺で、ばいばい👋





コメントを残す