さあ今回は”レイアウト”の作り方について学んでいこう!!
前回までは”Widget”についてまとめてきました👇
【Flutter/Dart④】Flutterのウィジェットについて
FlutterはWidgetを組み合わせていくことで複雑なUI表現できることを学びました。
レイアウトに関しても同じことが言えるため、前回の学びを踏まえて学習していこう✊
では早速やっていきます。
Container
✅ ボックスを表現することができる
👇Containerを使った実装例になります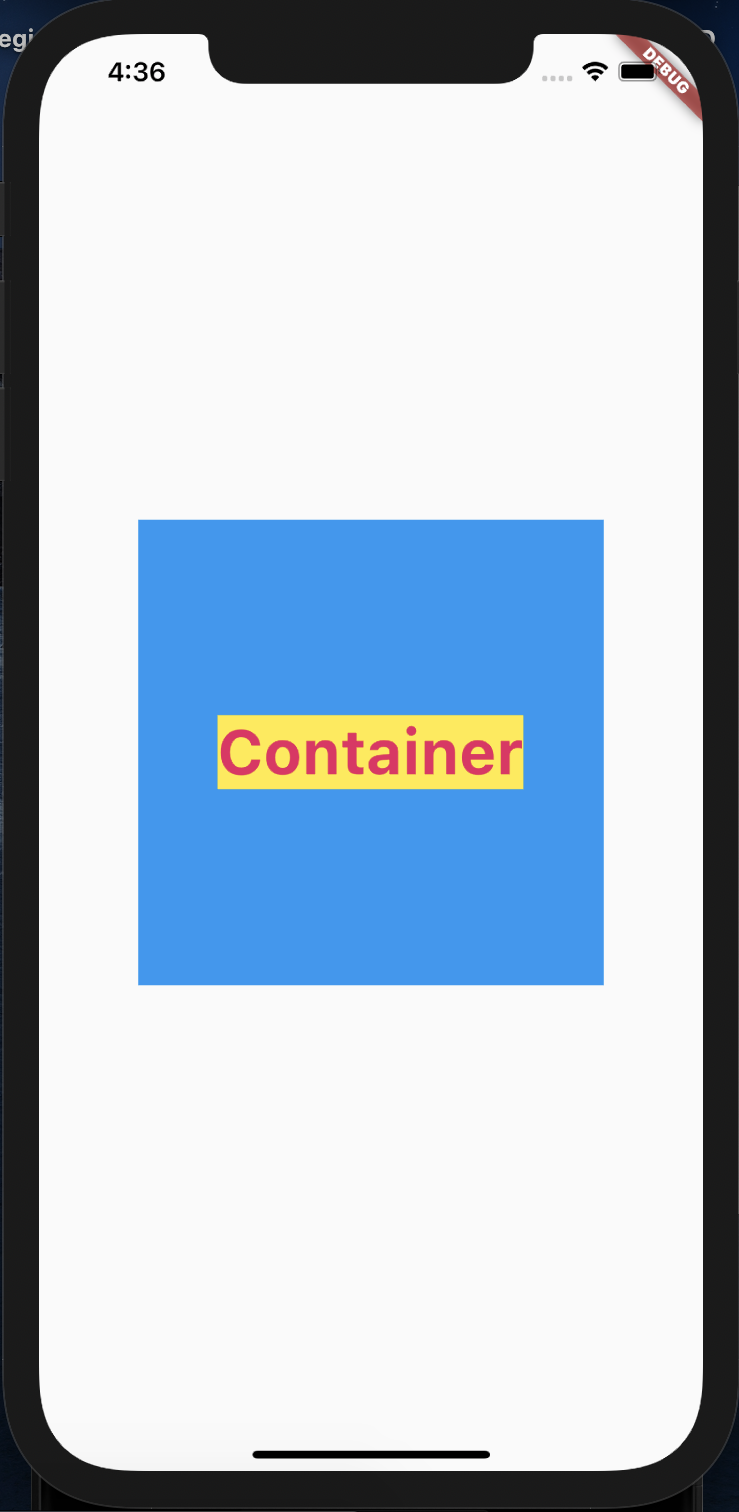
|
1 2 3 4 5 6 7 8 9 10 11 12 13 14 15 16 17 18 19 20 21 22 23 24 25 26 27 28 29 30 31 32 33 34 |
/* Container */ import 'package:flutter/material.dart'; void main() => runApp(MyApp()); class MyApp extends StatelessWidget { @override Widget build(BuildContext context) { return MaterialApp( title: "Container App", home: Scaffold( body: Center( child: Container( color: Colors.blue, //containerの色 width: 300.0, //containerの幅 height: 300.0, //containerの高さ alignment: Alignment.center, //テキストの位置 child: Text( "Container", // テキスト名 style: TextStyle( color: Colors.pink, //テキストの色 backgroundColor: Colors.yellow, //背景色 fontSize: 40, //文字の大きさ fontWeight: FontWeight.bold, //文字の太さ ), ), ), ), ), ); } } |
Row, Column
✅ mainAxisAlignment(start, center, end):上中下の調整
✅ crossAxisAlignment(start, center, end):左中右の調整
👇Containerの中でRow, Columnを使った実装例になります(その1)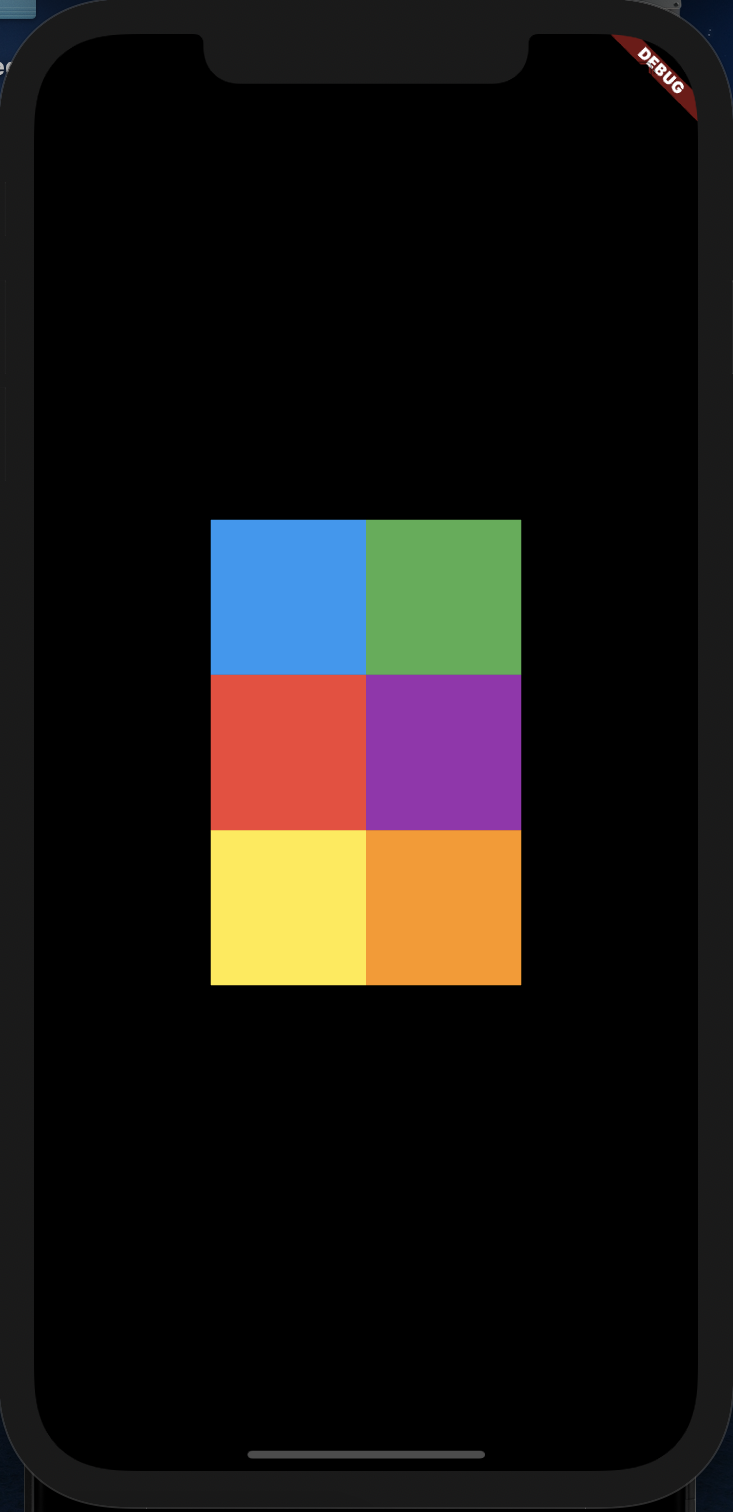
|
1 2 3 4 5 6 7 8 9 10 11 12 13 14 15 16 17 18 19 20 21 22 23 24 25 26 27 28 29 30 31 32 33 34 35 36 37 38 39 40 41 42 43 44 45 46 47 48 49 50 51 52 53 54 55 56 57 58 59 60 61 62 63 64 65 66 |
/* Container(Row,Column) */ import 'package:flutter/material.dart'; void main() => runApp(MyApp()); class MyApp extends StatelessWidget { @override Widget build(BuildContext context) { return MaterialApp( title: "Container App 2", home: Container( child: Row( // 行 mainAxisAlignment: MainAxisAlignment.center, // 中央に配置(他にstart、end、spaceAroundなど) children: <Widget>[ Column( // 列 mainAxisAlignment: MainAxisAlignment.center, children: [ Container( color: Colors.blue, width: 100, height: 100, ), Container( color: Colors.red, width: 100, height: 100, ), Container( color: Colors.yellow, width: 100, height: 100, ), ], ), Column( // 列 mainAxisAlignment: MainAxisAlignment.center, children: [ Container( color: Colors.green, width: 100, height: 100, ), Container( color: Colors.purple, width: 100, height: 100, ), Container( color: Colors.orange, width: 100, height: 100, ), ], ), ], ), ), ); } } |
👇 Containerの中でRow, Columnを使った実装例になります(その2)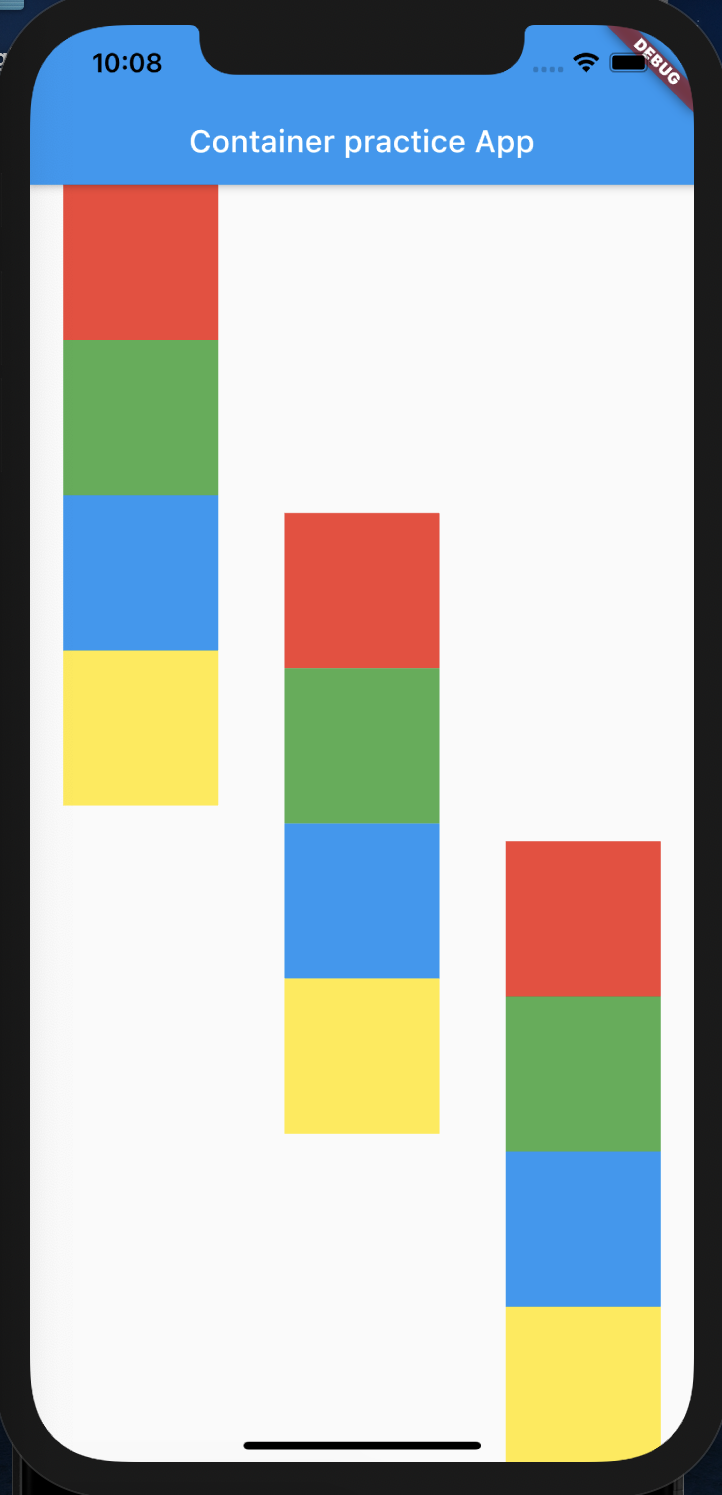
|
1 2 3 4 5 6 7 8 9 10 11 12 13 14 15 16 17 18 19 20 21 22 23 24 25 26 27 28 29 30 31 32 33 34 35 36 37 38 39 40 41 42 43 44 45 46 47 48 49 50 51 52 53 54 55 56 57 58 59 60 61 62 63 64 65 66 67 68 69 70 71 72 73 74 75 76 77 78 79 80 81 82 83 84 85 86 87 88 89 90 91 92 93 94 95 96 97 98 99 100 |
import 'package:flutter/material.dart'; import 'package:my_widgets_app/main_src.dart'; void main() => runApp(MyApp()); class MyApp extends StatelessWidget { @override Widget build(BuildContext context) { return MaterialApp( title: "practice", home: Scaffold( appBar: AppBar( title: Text("Container practice App"), ), body: Container( child: Row( mainAxisAlignment: MainAxisAlignment.spaceAround, children: <Widget>[ Column( mainAxisAlignment: MainAxisAlignment.start, children: [ Container( color: Colors.red, width: 100.0, height: 100.0, ), Container( color: Colors.green, width: 100.0, height: 100.0, ), Container( color: Colors.blue, width: 100.0, height: 100.0, ), Container( color: Colors.yellow, width: 100.0, height: 100.0, ), ], ), Column( mainAxisAlignment: MainAxisAlignment.center, children: [ Container( color: Colors.red, width: 100.0, height: 100.0, ), Container( color: Colors.green, width: 100.0, height: 100.0, ), Container( color: Colors.blue, width: 100.0, height: 100.0, ), Container( color: Colors.yellow, width: 100.0, height: 100.0, ), ], ), Column( mainAxisAlignment: MainAxisAlignment.end, children: [ Container( color: Colors.red, width: 100.0, height: 100.0, ), Container( color: Colors.green, width: 100.0, height: 100.0, ), Container( color: Colors.blue, width: 100.0, height: 100.0, ), Container( color: Colors.yellow, width: 100.0, height: 100.0, ), ], ), ], ), ), ), ); } } |
Expanded
✅ 画面いっぱいに引き伸ばすことができる
✅ RowやColumnなどと一緒に使うことが多い
✅ WidgetではなくContainerなどに対して適応⇨width: double.infinity
✅ Expanded(Flexibleなどの拡張性のあるWidget)はRow, Column, flexを親Widgetにする
👇 expandedを使った実装例になります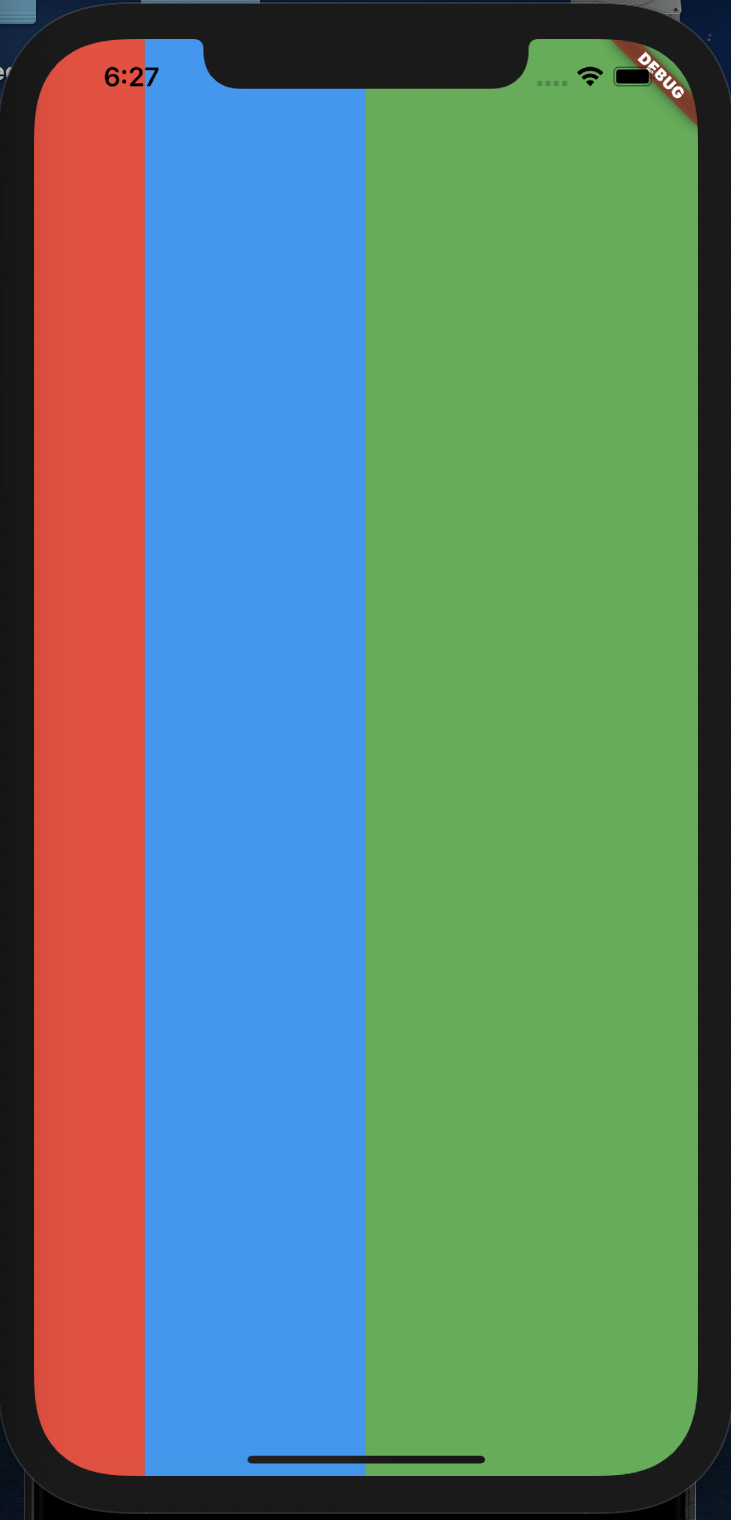
|
1 2 3 4 5 6 7 8 9 10 11 12 13 14 15 16 17 18 19 20 21 22 23 24 25 26 27 28 29 30 31 32 33 34 35 36 37 38 |
/* Expanded */ import 'package:flutter/material.dart'; void main() => runApp(MyApp()); class MyApp extends StatelessWidget { Widget build(BuildContext context) { return MaterialApp( title: "Expanded practice App", home: Container( child: Row( children: <Widget>[ // 画面に拡張して表示 Expanded( flex: 1, // 画面が占有されるように表示 child: Container( color: Colors.red, ), ), Expanded( flex: 2, child: Container( color: Colors.blue, ), ), Expanded( flex: 3, child: Container( color: Colors.green, ), ), ], ), ), ); } } |
Stack
✅ Widgetを重ねることができる
👇 Stackを使った実装例になります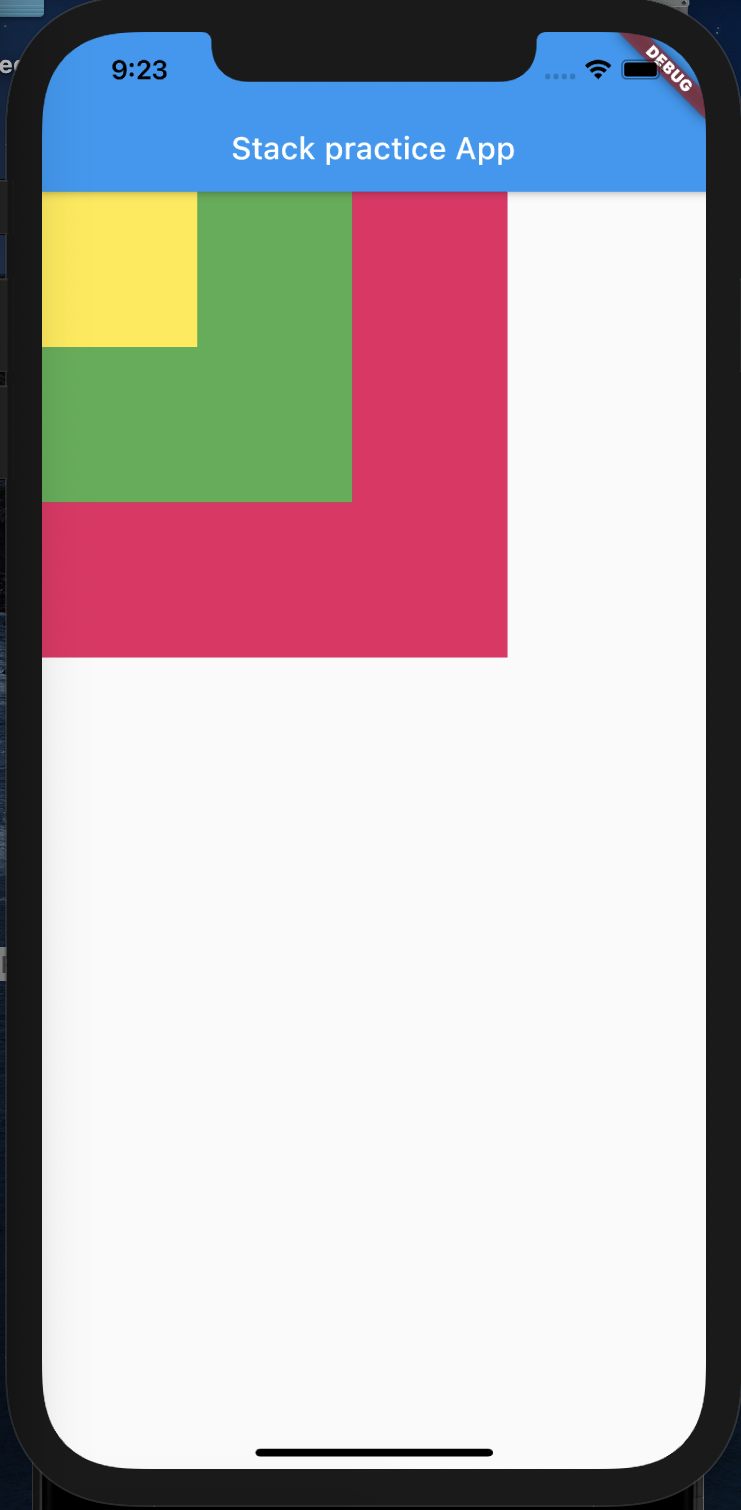
|
1 2 3 4 5 6 7 8 9 10 11 12 13 14 15 16 17 18 19 20 21 22 23 24 25 26 27 28 29 30 31 32 33 34 35 36 37 |
/* Stack */ import 'package:flutter/material.dart'; void main() => runApp(MyApp()); class MyApp extends StatelessWidget { @override Widget build(BuildContext context) { return MaterialApp( home: Scaffold( appBar: AppBar( title: Text("Stack practice App"), ), body: Stack( children: <Widget>[ Container( height: 300.0, width: 300.0, color: Colors.pink, ), Container( height: 200.0, width: 200.0, color: Colors.green, ), Container( height: 100.0, width: 100.0, color: Colors.yellow, ), ], ), ), ); } } |
Theme
MaterialAppのTheme設定できるプロパティについてめちゃめちゃ役に立つ記事があったので共有させて下さい👇
https://itome.team/blog/2019/12/flutter-advent-calendar-day12/
“【Flutter/Dart④】Flutterのレイアウトについて”は以上になります、いかがだったでしょうか?
他にもどんなWidgetがあるのか、こちらのまとめが参考になったので見てみて下さい👇
Flutter開発する前に知っておきたい35のWidget一覧
次回はインタラクティブなWidgetを学習していきたいと思います、楽しみにしてて下さいね!
今回はこの辺で、ばいばい👋






コメントを残す