※Firebase公式チュートリアルを参考にしています
本記事では、Flutter× Firebaseの設定及び連携の方法は理解している前提で解説をしていきたいと思います!Firebaseを最初から学んでいきたいよーって方は、下記の記事からチェック✅してみて下さい👇
今回はFirebaseの機能の一つであるFirebase Authを使ってアプリの新規登録やログイン機能の実装方法を解説していきたいと思います。この機能はアプリ開発において必須のスキルとなりますので、一緒に学んでいきましょー!
Contents
Firebase Authの設定
Authenticationの設定
FirebaseのAuthencationを設定することで、メールアドレスやSNS情報でアプリにログインできるようになります。その手順を見ていきます。
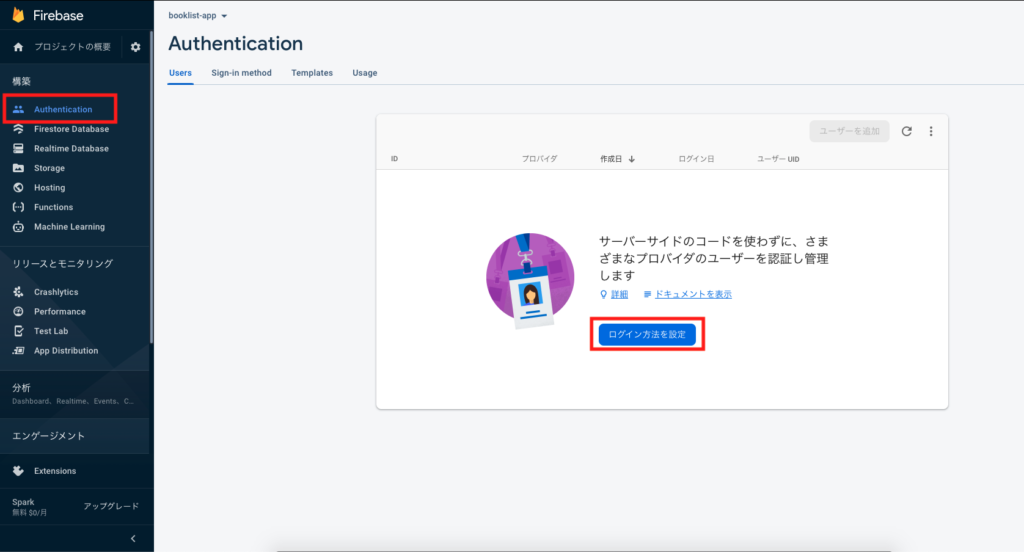
👇 Firebaseプロジェクトを一つ作成し、Authenticationの”ログイン方法を設定”をクリックします
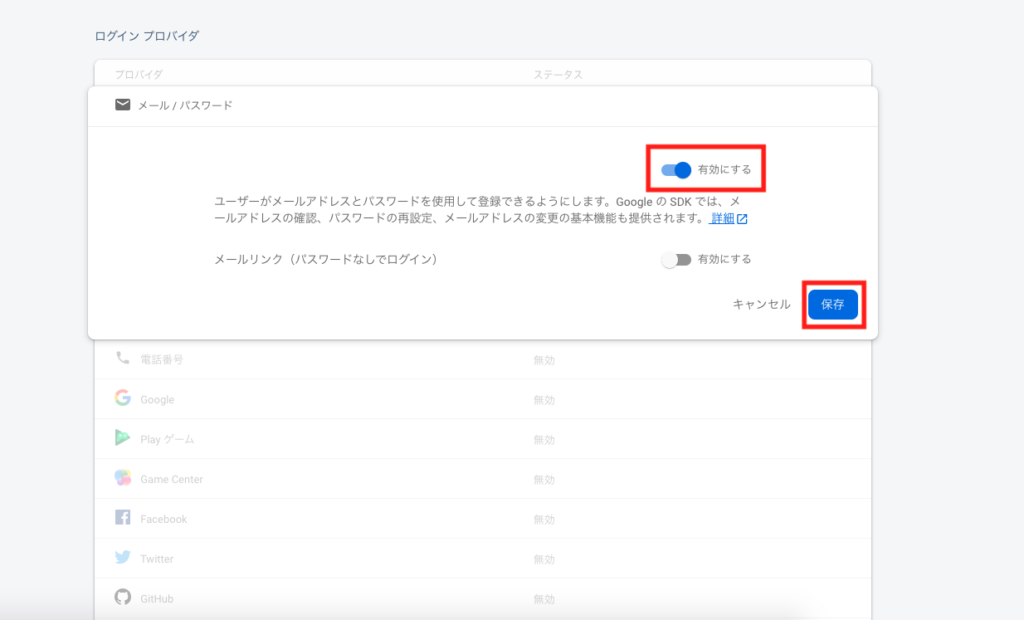
👇 今回は練習でメール/パスワードでのログイン機能を実装していきましょう。下記をクリックします。

👇 “有効にする”をタップし、”保存”を選択します。
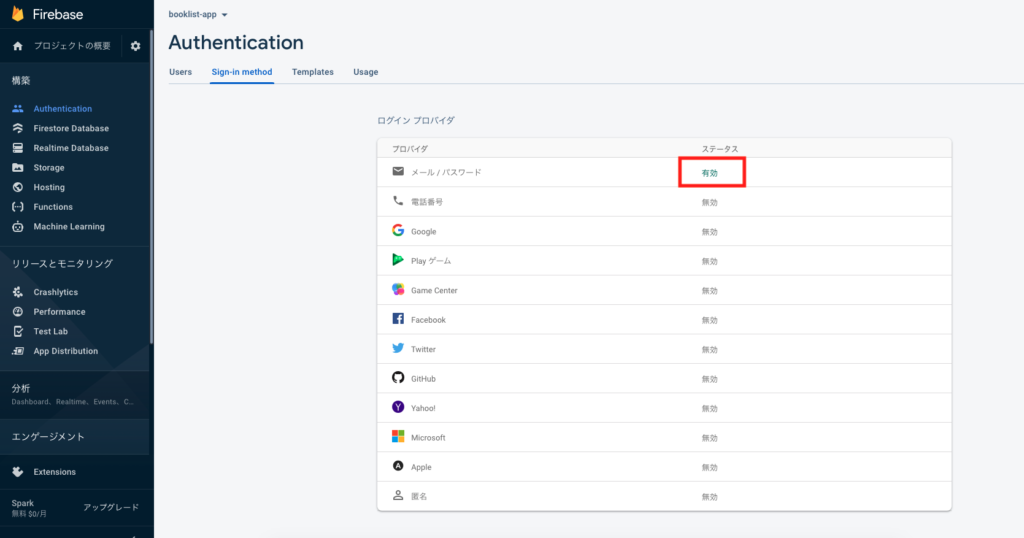
👇 “メール/パスワード”が有効になっているのが確認できます。これでAuthenticationの設定は完了です。
Firestore Databaseの設定
ユーザーの新規登録のタイミングでFirebaseeのAuthenticationにユーザー情報を書き込みにいきますが、それ以外の情報(パスワード、ユーザーネーム等)はFirebase FireStoreに情報を書き込みに行けるようにしたいため、FireStoreの設定もしていきます。
詳細は下記の記事の”データベースの設定”をご覧ください
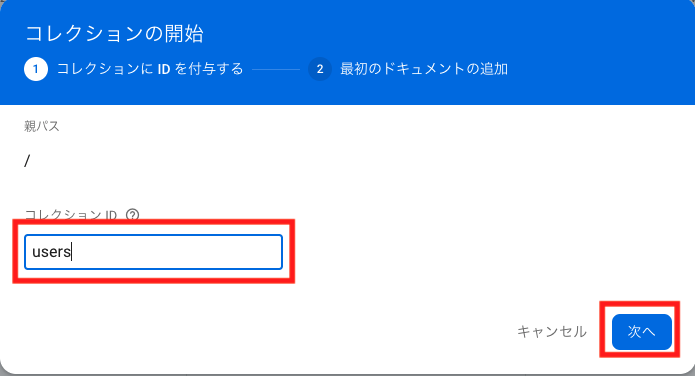
👇 ユーザー情報を保存するための箱を用意します
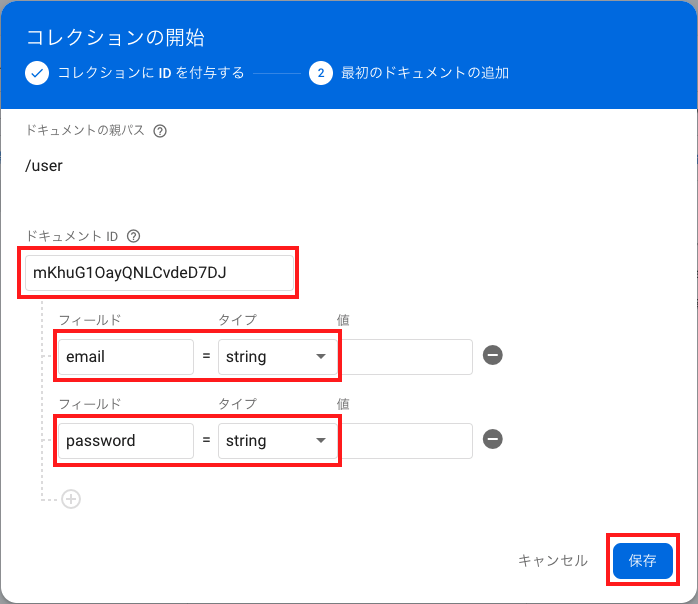
👇 詳細の設定をしていきます。コードでFireStoreに直接ユーザー情報を書き込めるようにしていきますが、今回は仮で作成します。”ドキュメントID”は自動IDをクリック、 “フィールド”と”タイプ”をそれぞれ以下のように設定し”保存”をクリックします。
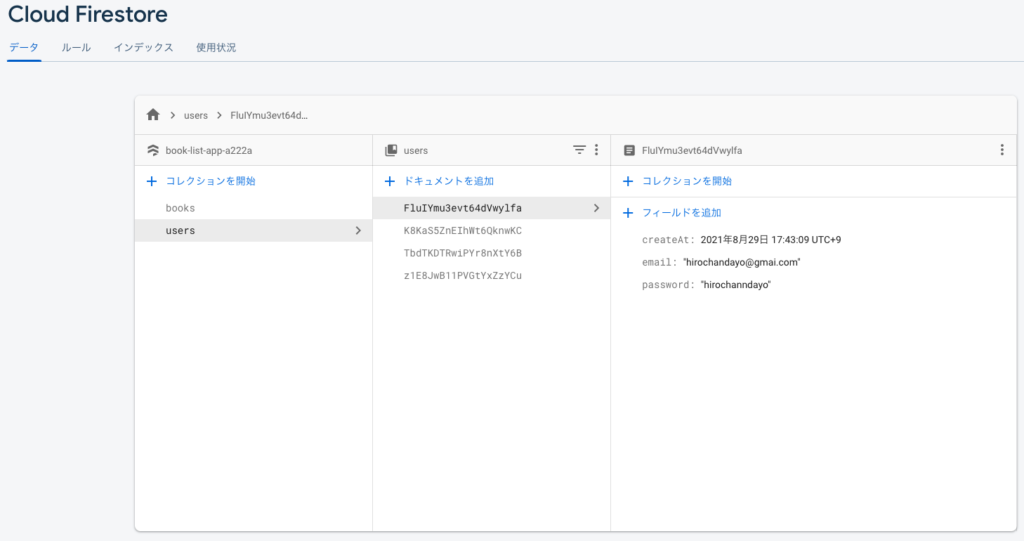
👇 するとこのように登録できたかと思います(この画像には関係ない項目もありますが気にしないで大丈夫です) ひとまずこれでFIreStoreの設定は完了です。
Flutterの設定
pubspec.yamlの設定
公式ドキュメント(firebase_auth)から設定方法を確認します。”Installing”に記載あるコードを転記します
|
1 2 3 4 |
<pubspec.yaml> dependencies: firebase_auth: ^3.1.0 |
Fluttterで実装
Firebase Authに新規登録
|
1 2 3 4 5 6 7 8 9 10 11 12 13 14 15 16 17 18 19 20 21 22 23 24 25 26 27 28 29 30 31 32 33 |
import 'package:cloud_firestore/cloud_firestore.dart'; import 'package:firebase_auth/firebase_auth.dart'; import 'package:flutter/material.dart'; class SignUpModel extends ChangeNotifier { String mail = ""; String password = ""; //FirebaseAuthのインスタンスを生成 final FirebaseAuth auth = FirebaseAuth.instance; Future signup() async { if (mail.isEmpty) { throw "メールアドレスを入力して下さい"; } if (password.isEmpty) { throw "パスワードを入力して下さい"; } //Fire Auth に新規登録ユーザーの情報を書き込む final UserCredential user = await auth.createUserWithEmailAndPassword( email: mail, password: password, ); final email = user.user!.email; // FireStoreに新規登録ユーザーの情報を書き込む await FirebaseFirestore.instance.collection("users").add({ "email": email, "password": password, "createAt": Timestamp.now(), }); } } |
Firebase Authでログインする
|
1 2 3 4 5 6 7 8 9 10 11 12 13 14 15 16 17 18 19 20 21 22 23 24 25 26 |
import 'package:firebase_auth/firebase_auth.dart'; import 'package:flutter/material.dart'; class LoginModel extends ChangeNotifier { String mail = ""; String password = ""; //FirebaseAuthのインスタンスを生成 final FirebaseAuth auth = FirebaseAuth.instance; Future login() async { if (mail.isEmpty) { throw "メールアドレスを入力して下さい"; } if (password.isEmpty) { throw "パスワードを入力して下さい"; } //ToDo final userInfo = await auth.signInWithEmailAndPassword( email: mail, password: password, ); // final uid = userInfo.user!.uid; } } |


コメントを残す